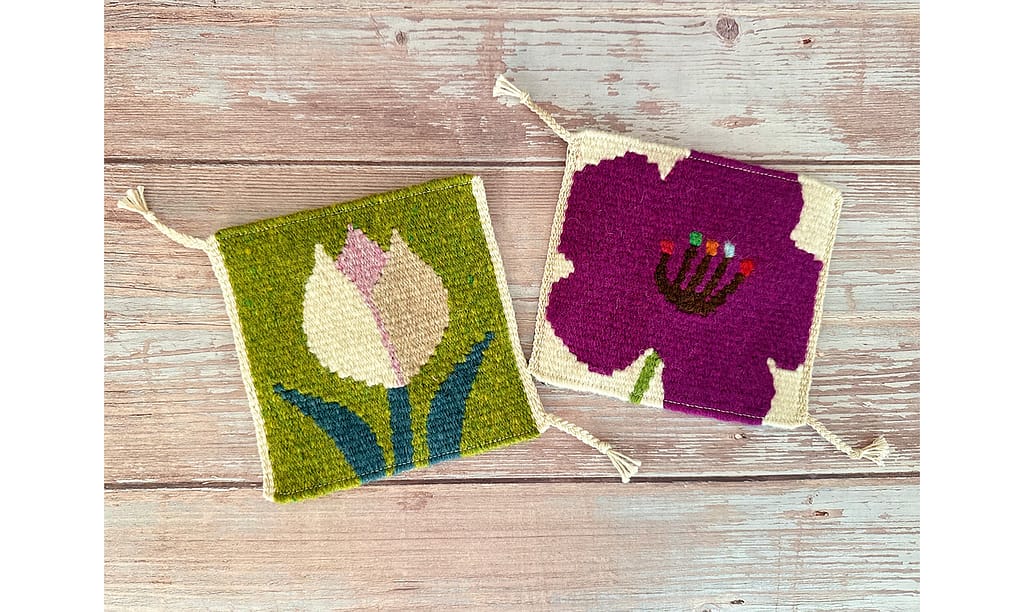
In the finishing steps described so far, we have made the fringe, sewed the edges and finished the weft on the back side leaving about a half inch of the weft threads.
If you want to give your weavings as presents to family or friends afterwards, you may want to finish the projects in several more steps:
Here are the details of each procedure.
これまで説明してきた手順では、フリンジを作成して、端を縫い、裏側のヨコ糸を、1センチほど残したところで完成としました。
この後、手織りタペストリーをご家族やお友達にプレゼントとして渡したい場合には、さらにいくつかの手順で仕上げていきましょう。
それぞれの手順を詳しく説明していきます。
1. Sewing slits | スリットになった部分を、手縫いして閉じる
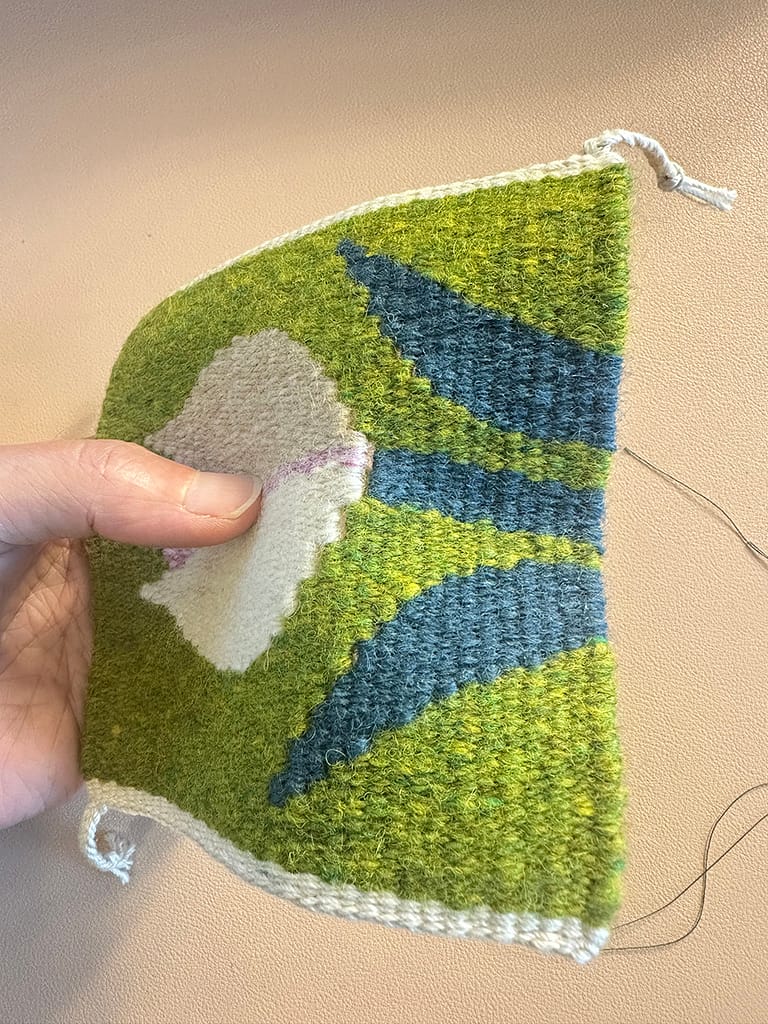
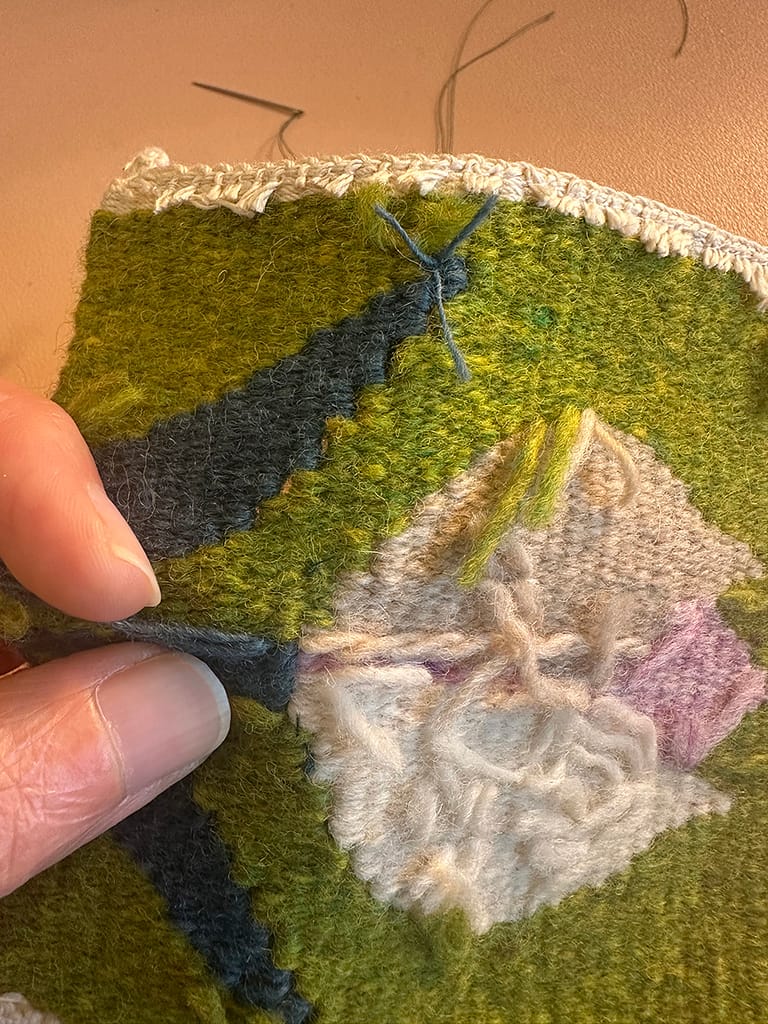
Slits will occur in designs with long vertical lines.
In photo 1, a slit has formed at the border between the tulip flower and the stem. You can leave it as it is without doing anything, but if it bothers you, sew it on the back side for a clean look.
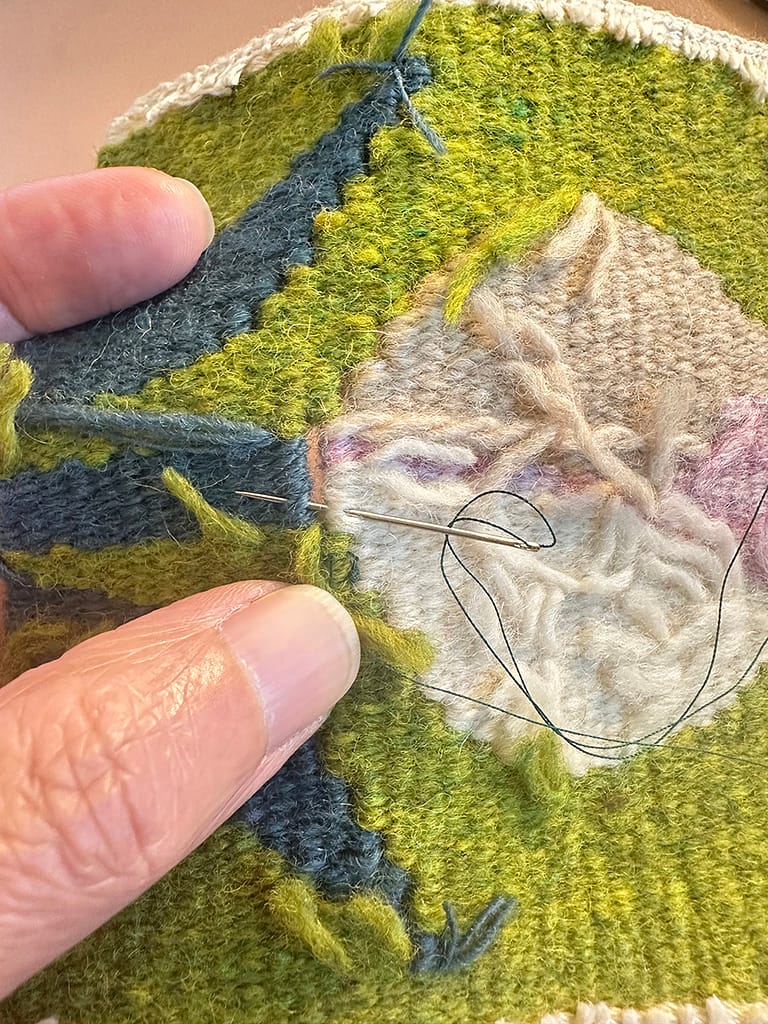
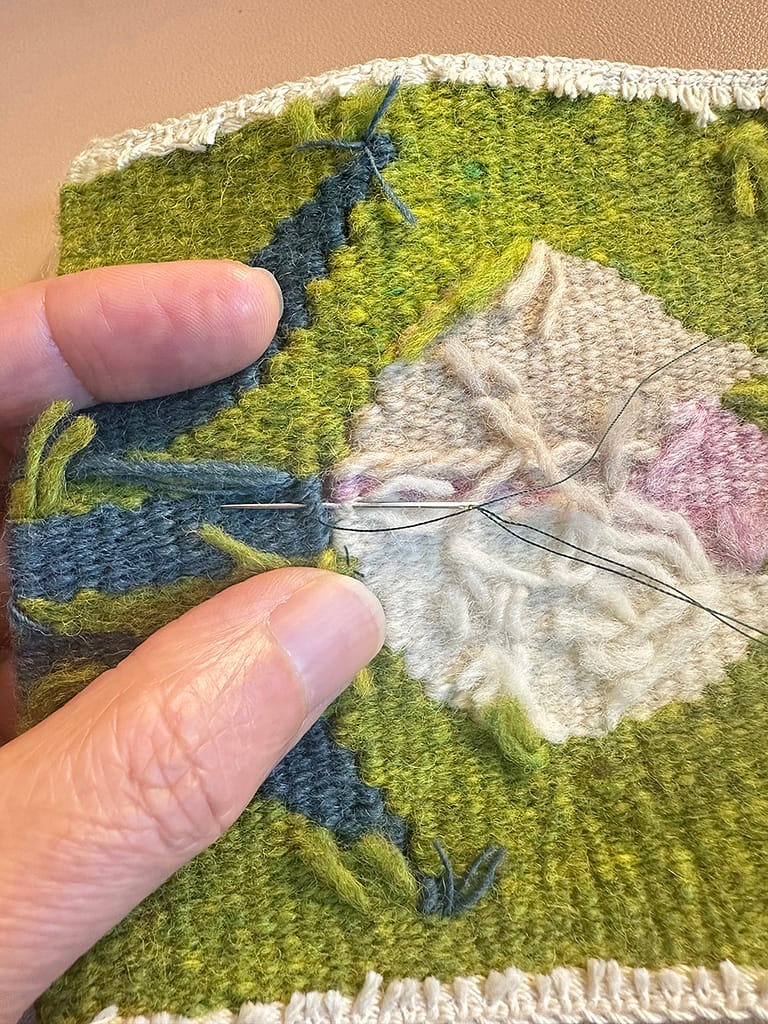
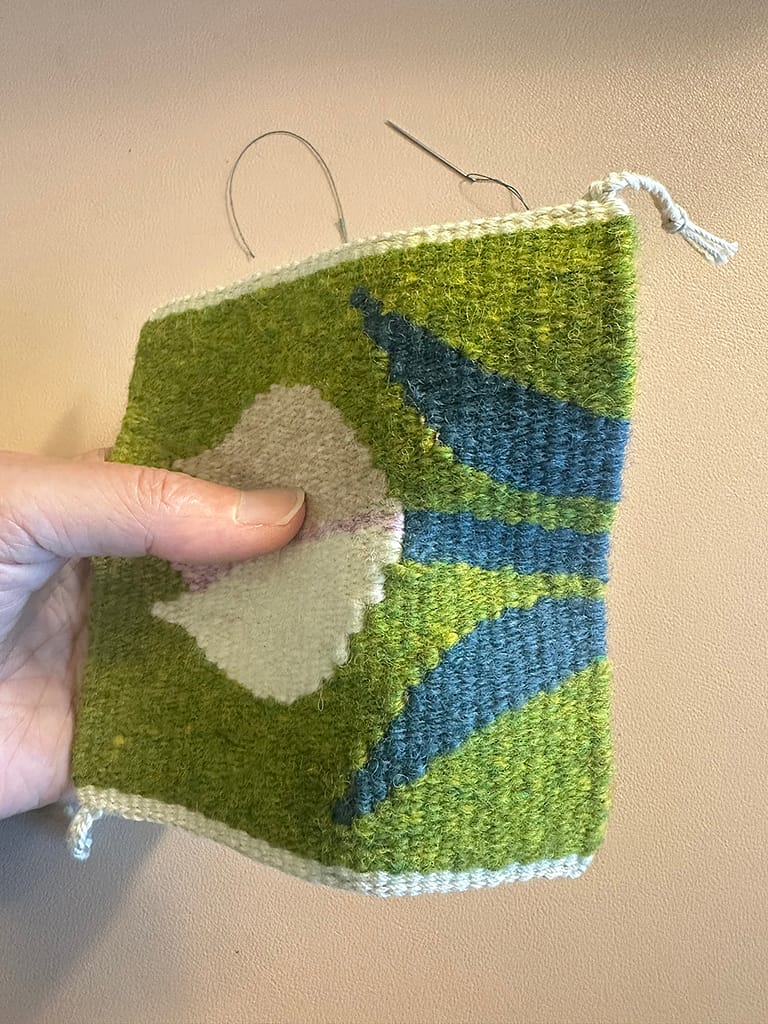
To sew the slit, stitch from the back side so that the seam is not visible on the front side. As shown in photos 2 and 3, the stitching is repeated by scooping a little from the right side of the slit, inserting the needle, and then bringing the needle out to the left side of the slit.
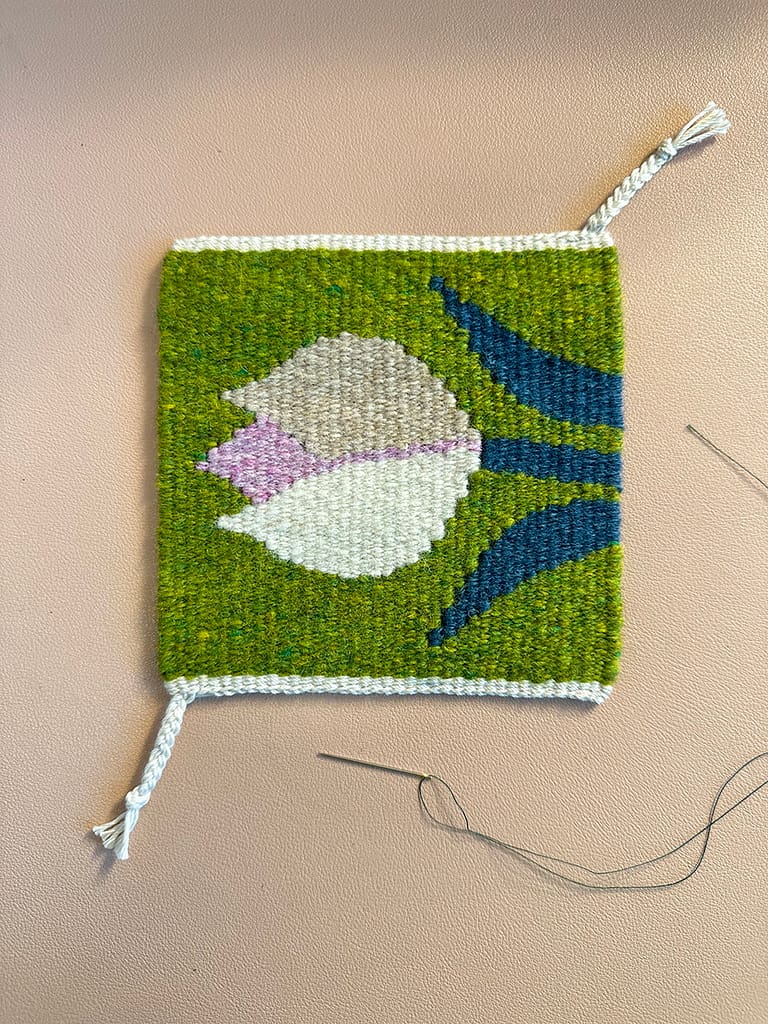
As shown in photo 4, the seam is visible on the back side, but not on the front side as shown in photos 5 and 6.
縦に長いラインのデザインではスリットが発生します。
写真1では、チューリップの花と茎の境目にスリットができています。何もせずにそのままにしてもよいですが、気になる場合は、裏側から手縫いするときれいに仕上がります。
縫い方は、表側に縫い目が見えないよう、裏側からまつり縫いをします。写真2と3のように、スリットの右側から少しすくって針を刺し、スリットの左側に針を出すという縫い方を繰り返します。
写真4のように、裏側では縫い目が見えますが、写真5と6のように、表側では縫い目は見えません。
2. Lining for coasters/mini mats | コースター用に使えるように、裏地を縫い付ける
Lining your finished pieces with cotton, jute or stain-resistant fabric would make them suitable for coasters and mini mats. They can also be great small presents for your family and friends.
出来上がった手織りタペストリーに、裏地として、コットンやジュート、あるいは汚れに強い布で縫い付けると、コースターやミニマットとして、素敵に仕上がります。ご家族やお友達へのプレゼントにも最適です。
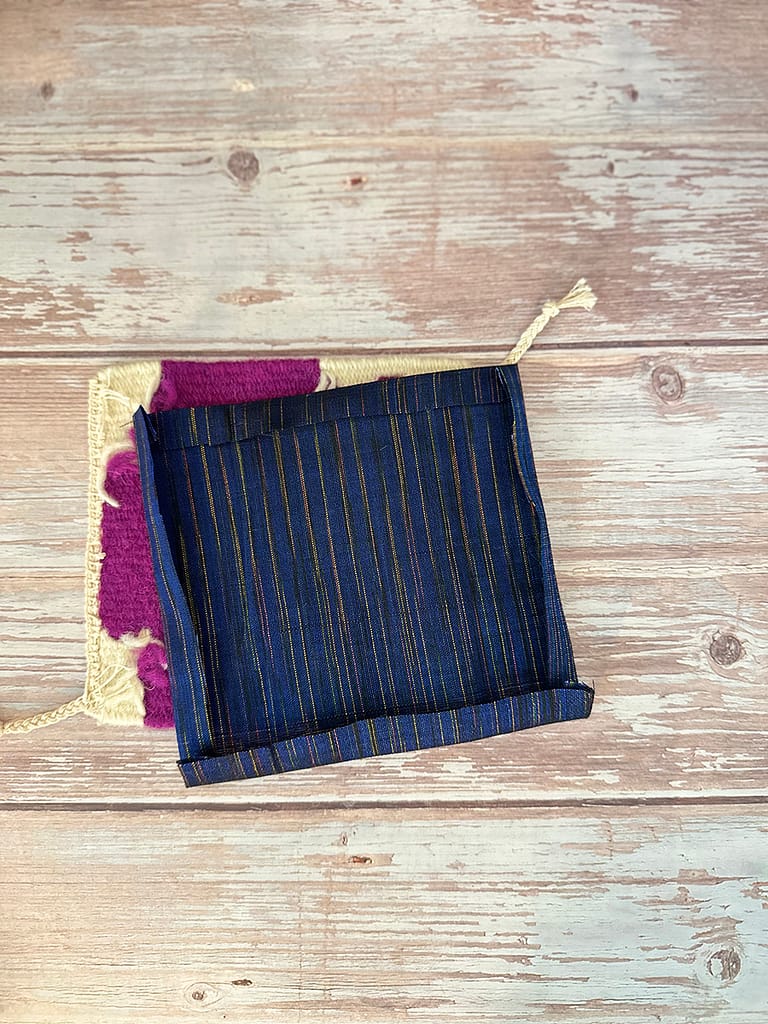


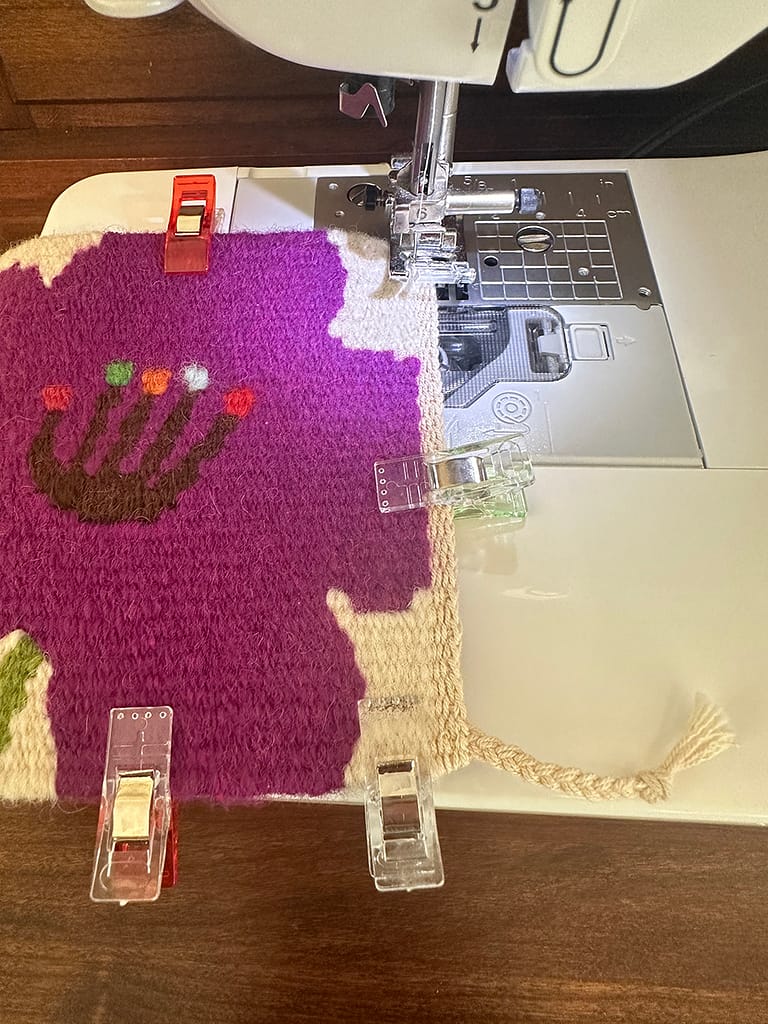


For fabrics that tend to fray at the edges, such as cotton, make a seam allowance. As shown in photo 1, iron and crease the seam allowance so that the finished lining is about 1 to 2 mm (0.04 to 0.08 in) smaller than the weaving.
As shown in photos 2-6, cut the corners of the seam allowance slightly to remove the right angles and make it naturally follow the corners of the weaving.
When sewing with a sewing machine, sew on the front side to straighten the seams for a clean finish. To prevent the weaving and lining from shifting, fix them firmly with clips/marking pins and sew 3 to 4 mm (0.1 to 0.15 in) inside from the edge (photos 7 and 8).
For fabrics such as jute (photo 9), for which fraying at the edges is not a concern if sewn from the top, adjust only the corners slightly and sew it with a sewing machine without a seam allowance.
コットンなど、端がほつれやすい生地は、縫い代を作ります。写真1のように、裏地の出来上がりが手織りタペストリーより1~2ミリくらい小さいサイズになるよう、縫い代にアイロンをかけて折り目をつけます。
写真2~6のように、縫い代の角を少しカットして、直角を取り除き、手織りタペストリーの角に自然に沿うような形にします。
ミシンで縫うときには、表側を縫うと、縫い目がまっすぐになり、きれいに仕上がります。タペストリーと裏地がずれないよう、クリップや待ち針などでしっかり固定して、端から3~4ミリ内側を縫います(写真7と8)。
ジュート(写真9)など、上から縫えば端のほつれが気にならない生地は、角だけ少し調整して、縫い代なしでミシンで縫っていきます。

Practical gifts are now complete! | 実用的なプレゼントが完成です!
It is just the right size for use as coasters, mug rugs, mats for vases, etc.
Thank you for reading to the end!
コースターや花瓶用のマットなどに使っていただけるのに、ちょうどいいサイズですね。
最後まで読んでいただき、ありがとうございます。
