
At the end of each weft, tailing is performed to secure the end of the thread.
Tailing differs depending on whether the weft is on the front or back side of the warp. In this article, I will show you tailing methods in various cases.
それぞれのヨコ糸の終点では、テール処理を行って、糸の端を固定します。
ヨコ糸がワープの表側か裏側かによってテール処理が異なってきます。この記事では、様々なケースでのテール処理のやり方を紹介します。
1. Making a pigtail | ピッグテールを作る
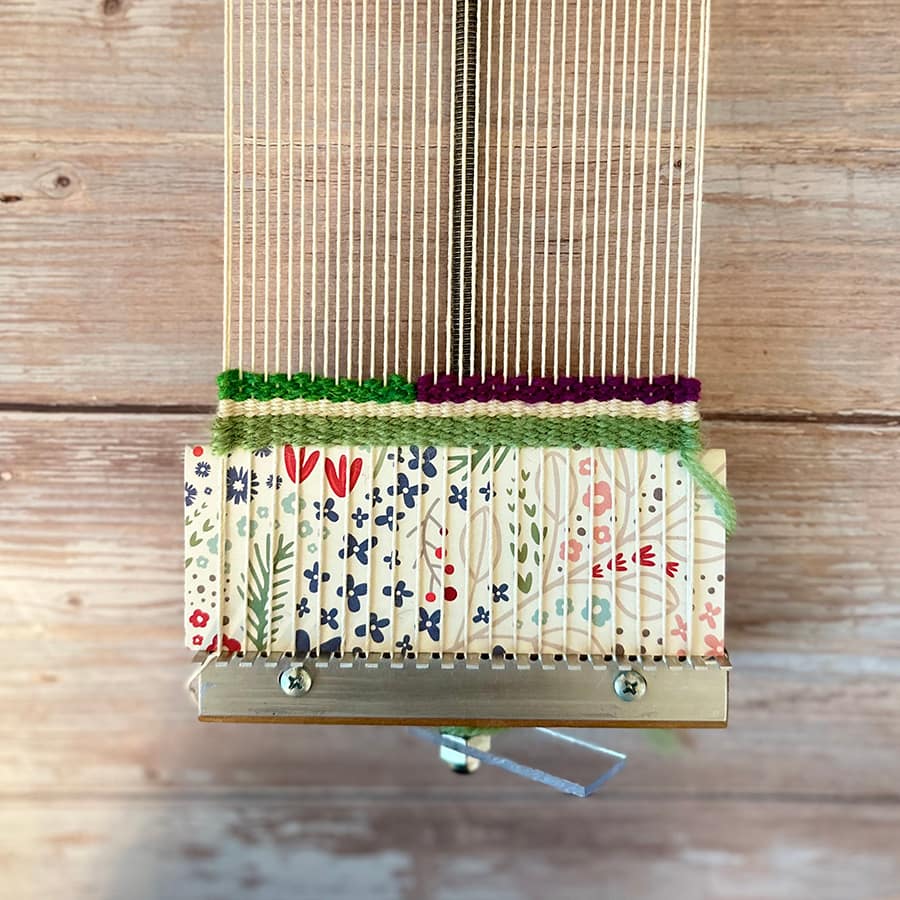
The pigtail, which I briefly mentioned in the article “Loom Weaving Preparations“, I use this tailing to secure the end of the waste yarn.
以前の記事「織る前の手織り機の準備」で簡単に紹介したピッグテールですが、私がこのテール処理を行うのは、屑糸の最後を固定するときに使います。
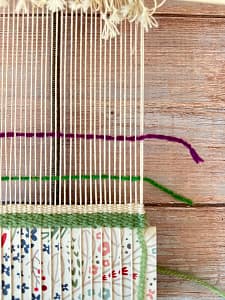
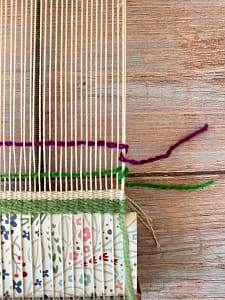
If the waste yarn ends behind the rightmost or leftmost warp, turn it to the front of that warp and pass it through to the back. See the green yarn in the photos.
If the waste yarn ends on the front side of the rightmost or leftmost warp, turn it behind that warp and pass it through to the front side. See the dark purple-pink yarn in the photos.
In this way, the tail will be secured.
屑糸が一番右端か左端のワープの後ろで終わっている場合は、そのワープの前側に回して、後ろに通します。写真の緑の屑糸を参照してください。
屑糸が一番右端か左端のワープの前側で終わっている場合は、そのワープの後ろに回して、前側に通します。写真の赤紫の屑糸を参照してください。
これで、テールが固定されます。
2. Tailing at the rightmost or leftmost warp in the body part | 本体部分の右端または左端のワープでのテール処理
Next, I will introduce the tailing of the body part.
First off, I will explain the process of tailing at the right (or left) end of the warp in order with photos.
次に、本体部分のテール処理を紹介していきます。
まずは、右端(または左端)のワープでテール処理をするプロセスについて、写真とともに順番に説明します。
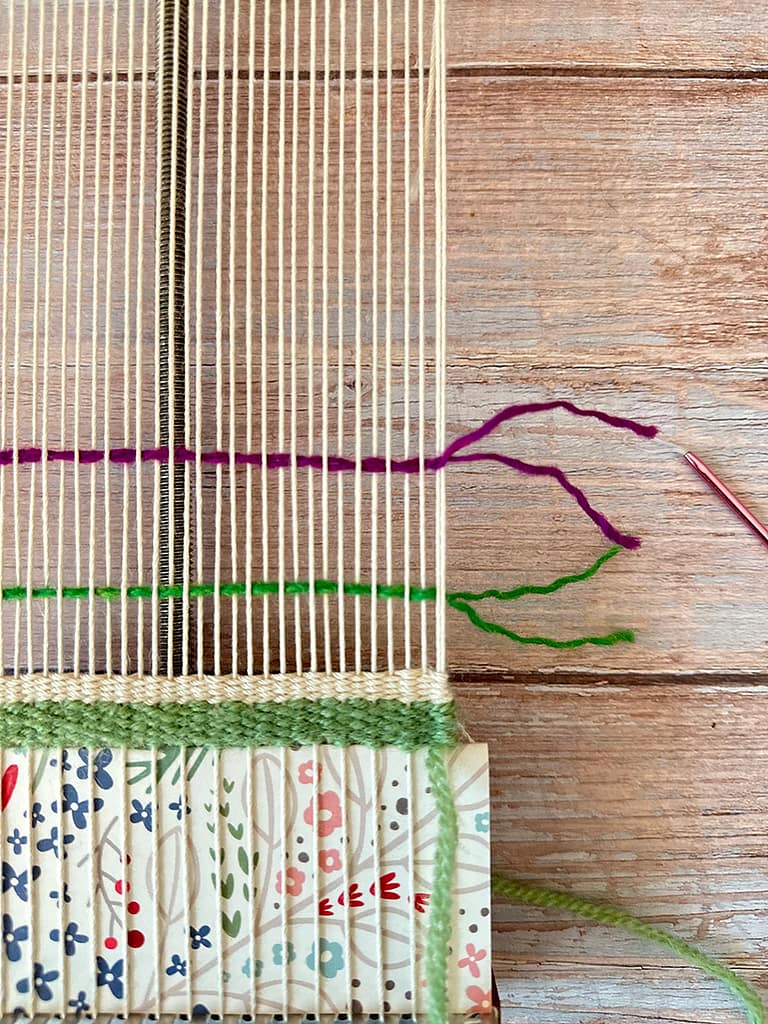
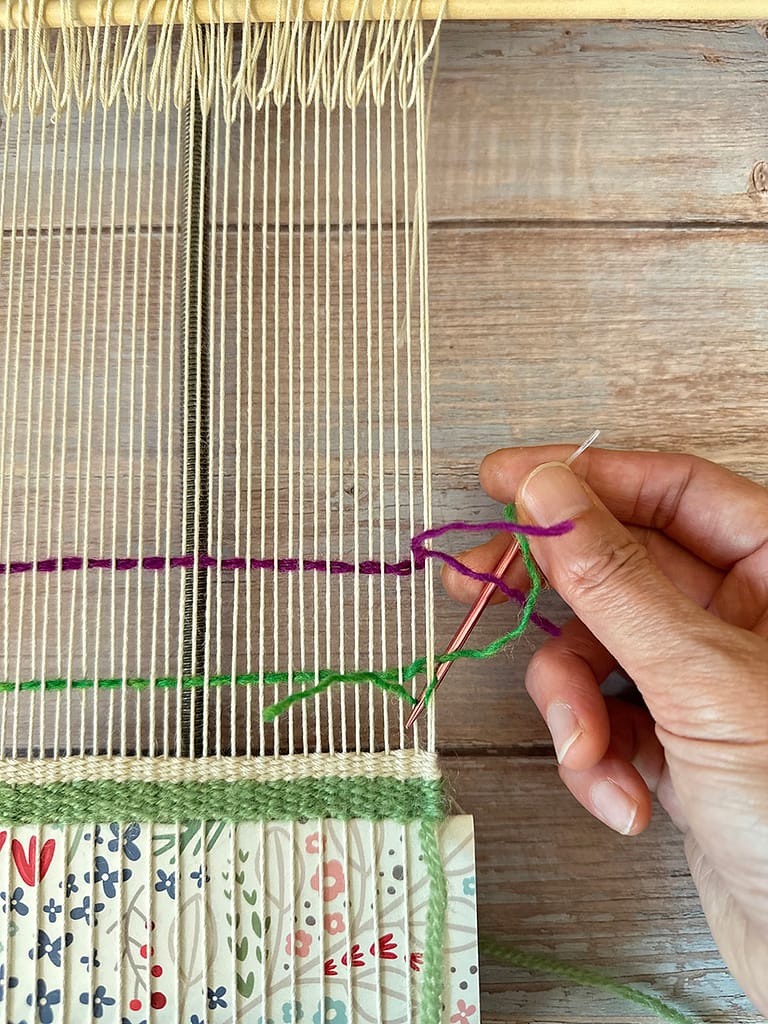
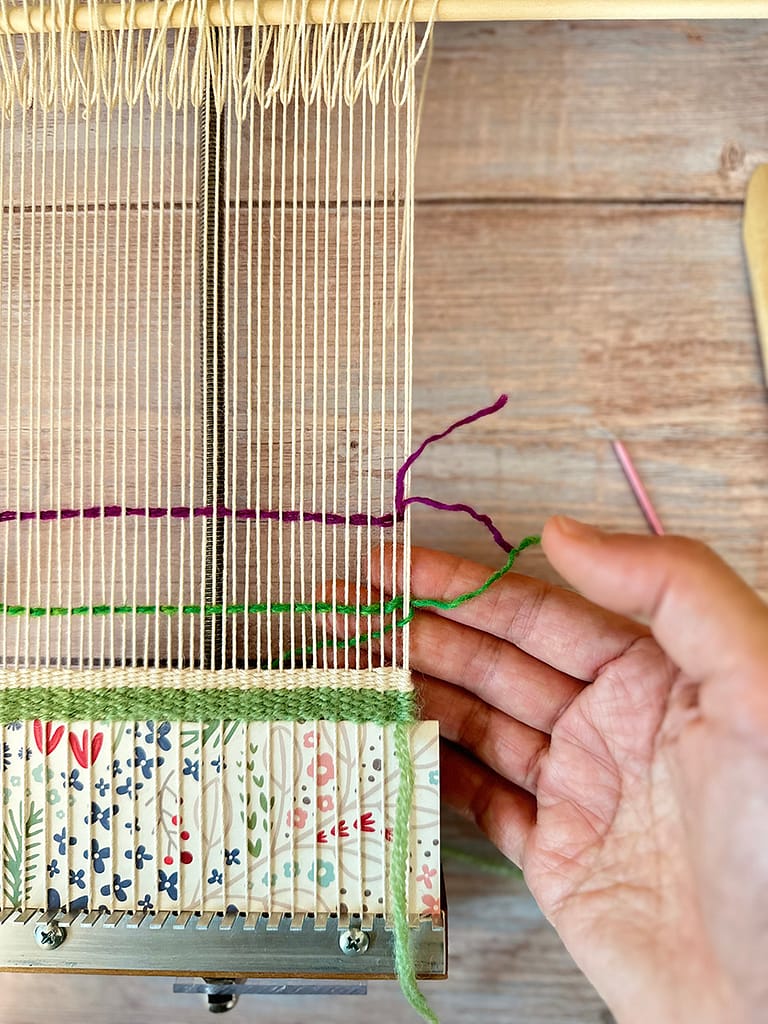
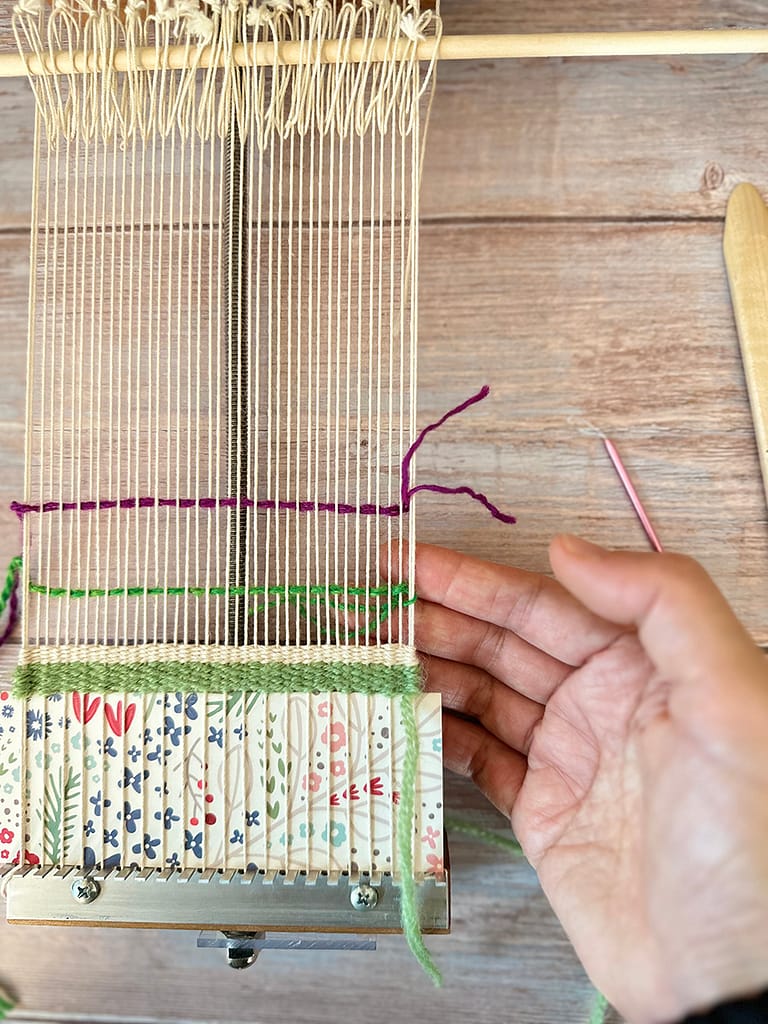
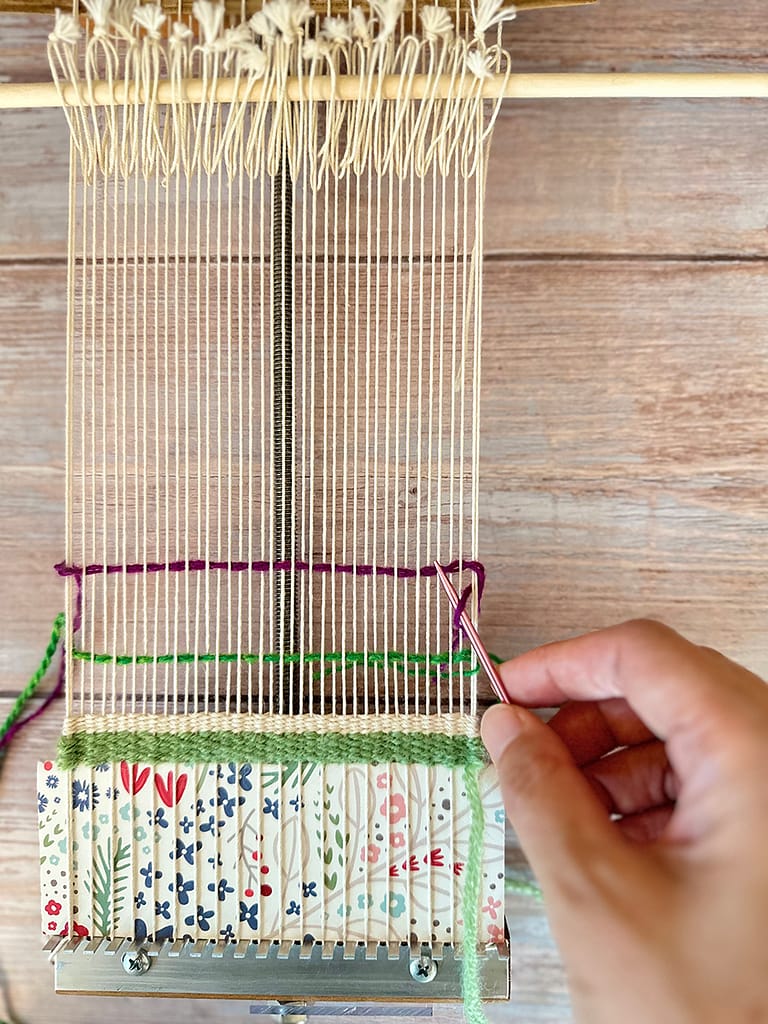
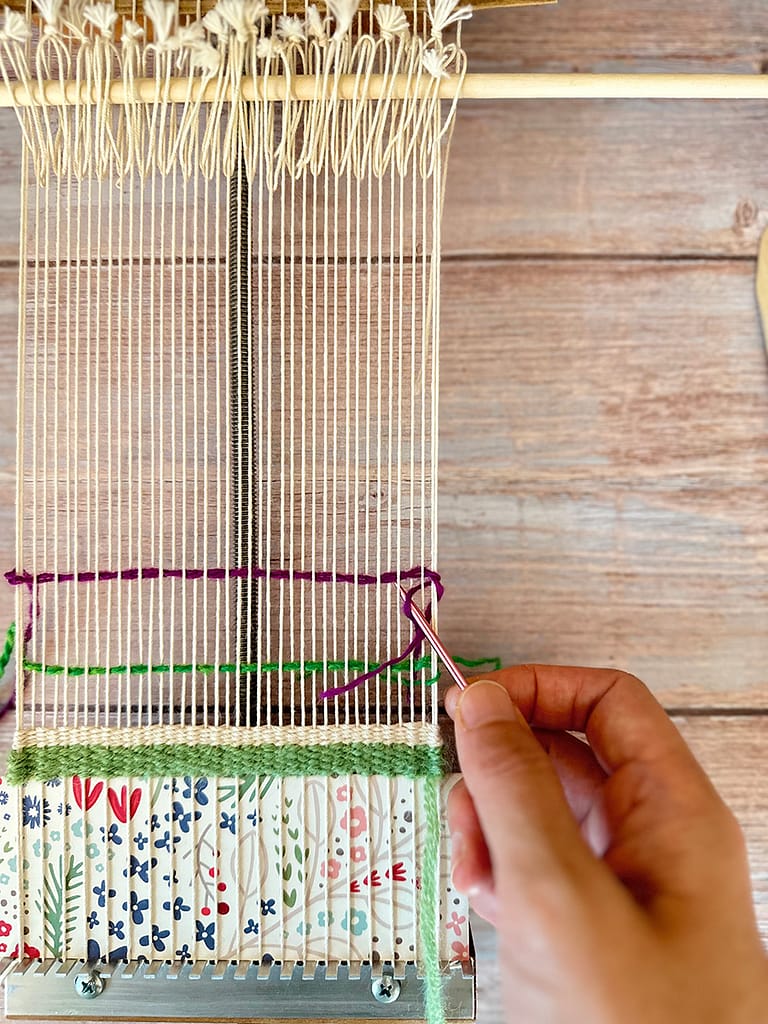
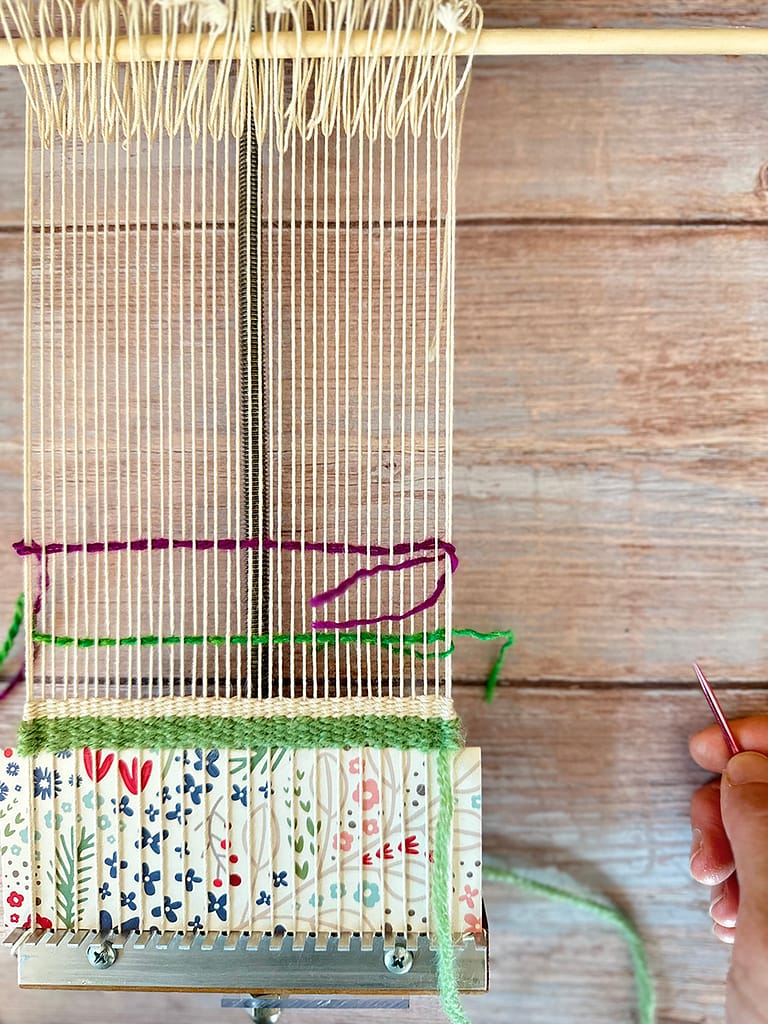
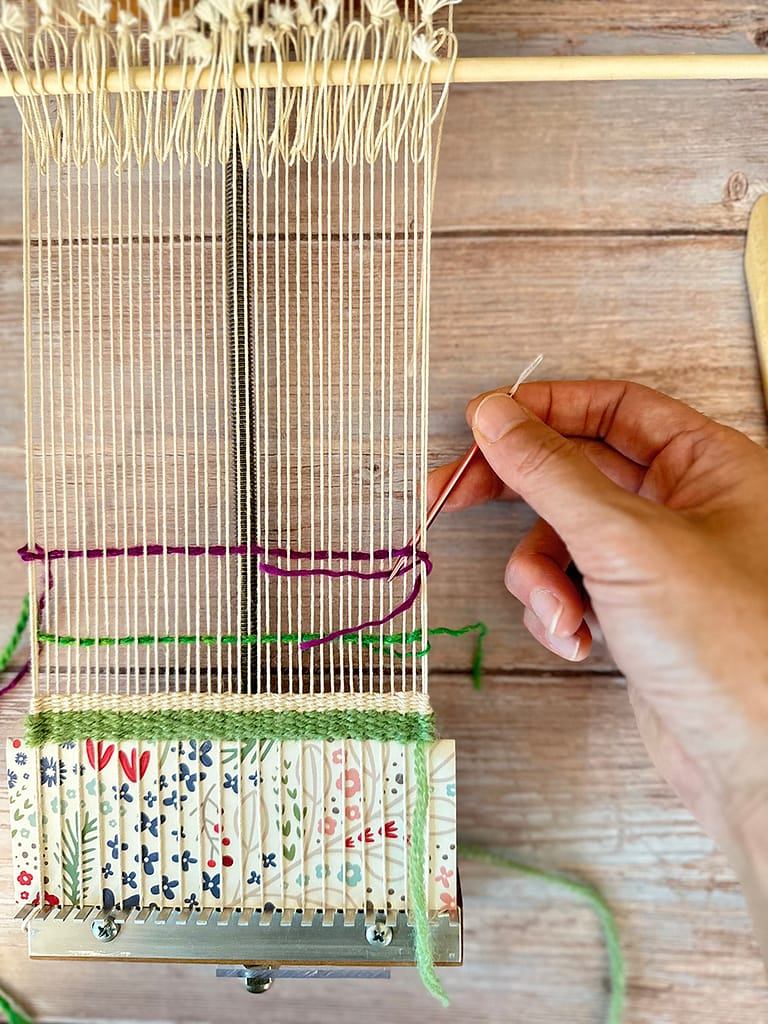
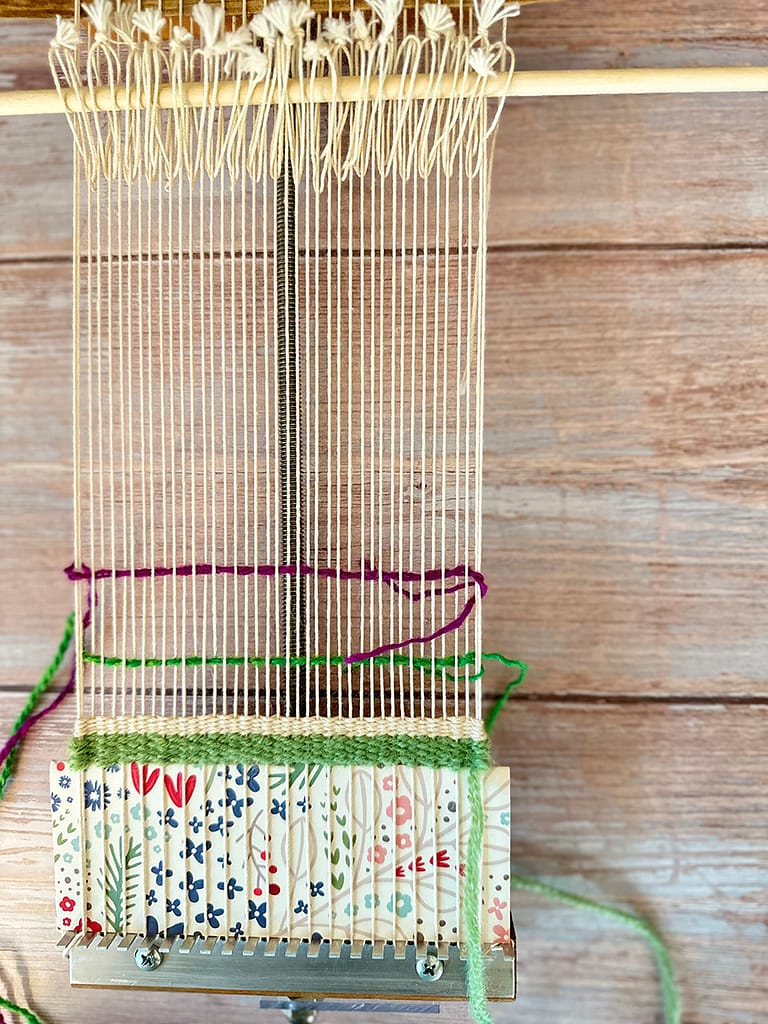
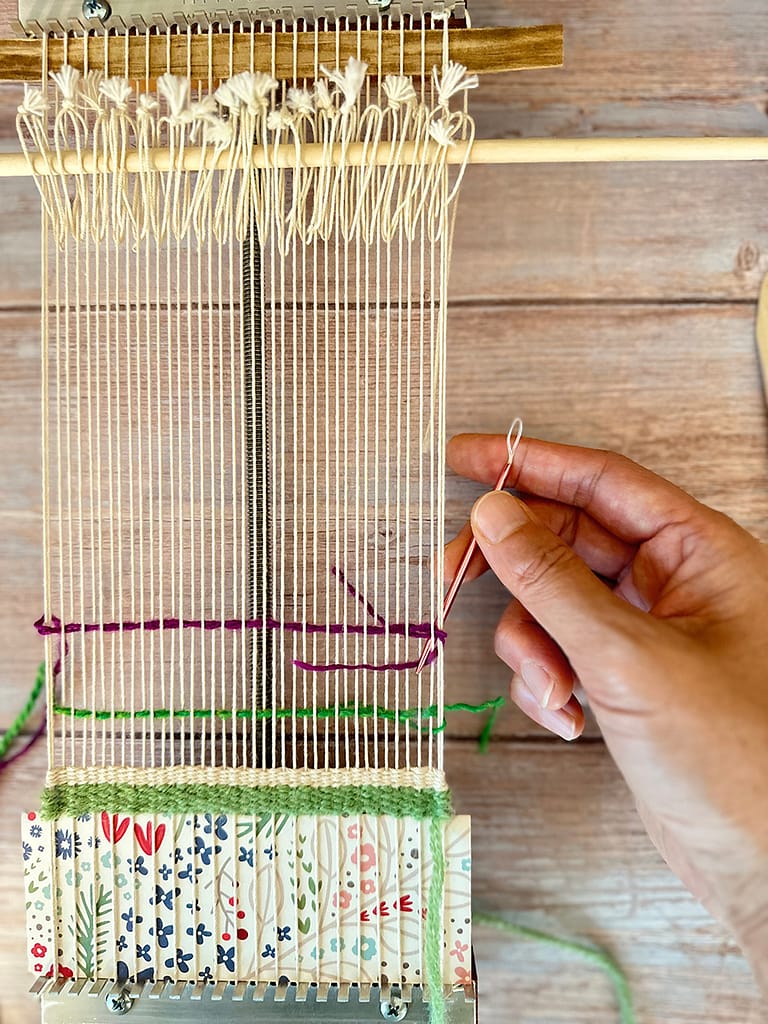
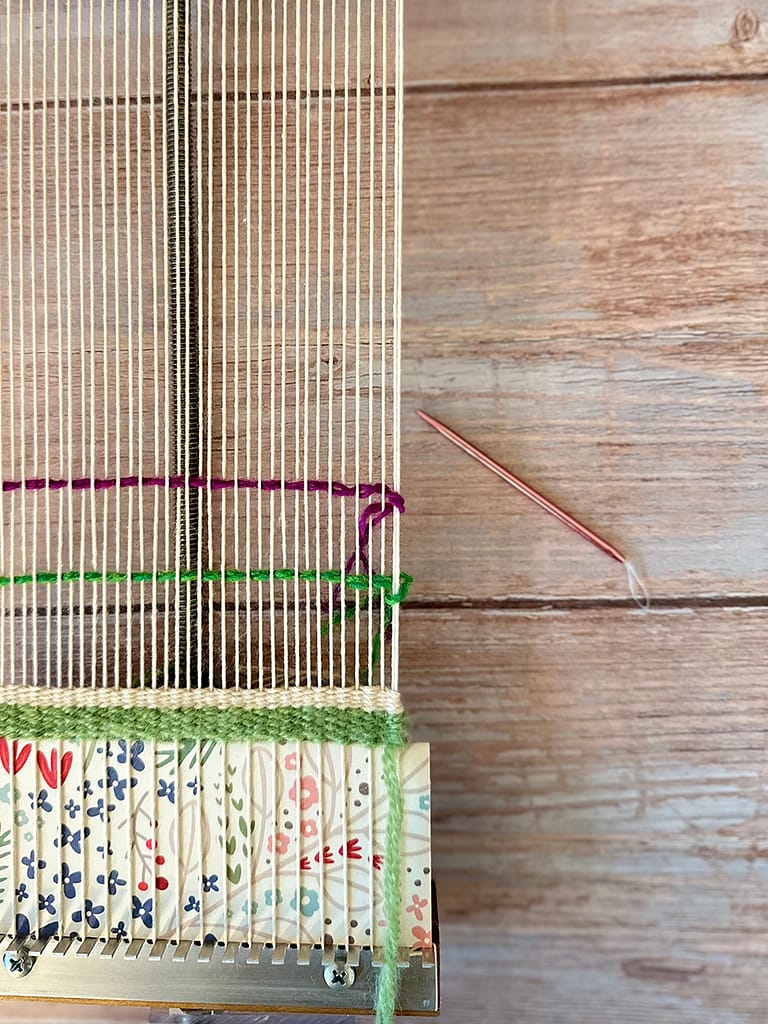
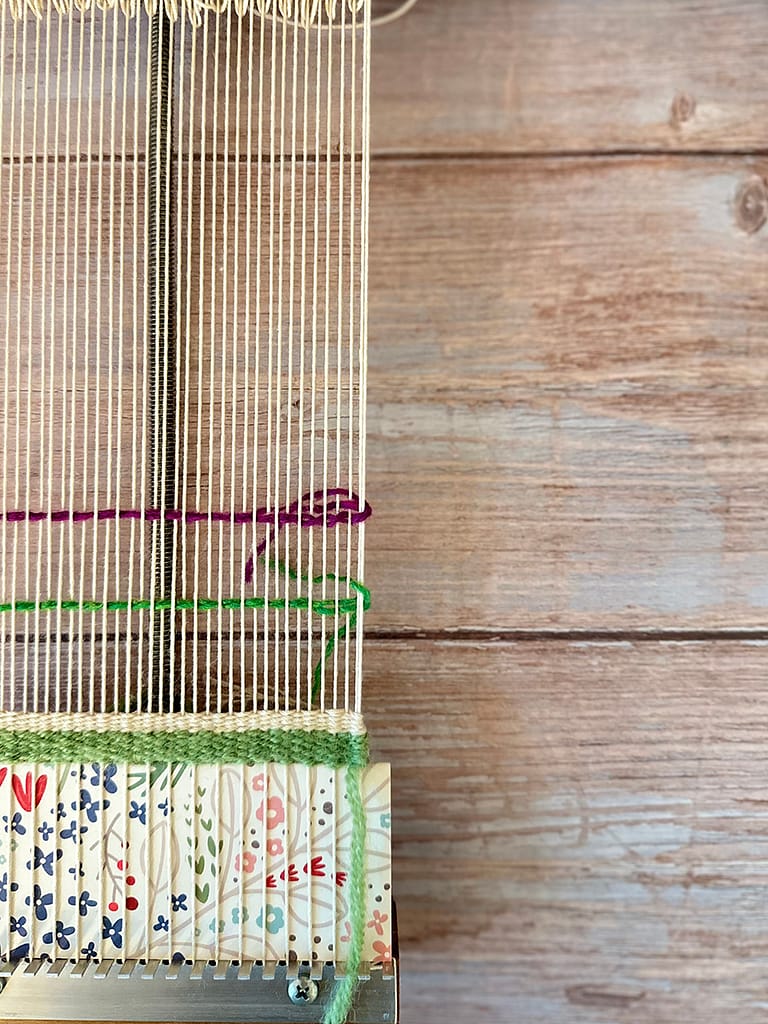
Photo 1: The green weft ends at the back side of the right-most warp. The dark purple-pink weft ends on the front side of the same warp. Each weft is split at the end and divided into two tails.
Photos 2 and 3: Tailing from the green weft. Turn one of the tails divided into two around the front side of the warp and pass it through to the back side. Using a weaving needle as shown in the photo makes it easier to thread the weft between the warps.
Photo 4: The other tail of the green weft is swept to the back without passing it anywhere, and the tailing is complete.
Photo 5: Tailing of the dark purple-pink weft. One of the tails goes around the back of the rightmost warp and out the front side.
Photos 6-9: The other tail of the dark purple-pink weft goes around the back of the second warp from the right and out the front side, then around the front of the third warp and through the back side.
Photo 10: The first tail of the dark purple-pink weft between the first end and the second warp is passed through the front side of the second warp to the back side.
Photo 11: You can see the difference in tailing between the green weft and the dark purple-pink weft.
In photos 2 through 11, the tails are threaded on the lower side of the weft. In some cases, as shown in photo 12, the tails are threaded on the upper side of the weft. For example, if you continue weaving with weft of the same color on the upper side, you can thread the tails on the upper side.
When threading the lower side, it would be difficult to thread the tails without a needle. On the other hand, when threading the upper side, it is easier to wrap the tails around the warp with your fingers without using a needle.
写真1:緑のヨコ糸は、右端のワープの後ろ側で終わっています。赤紫のヨコ糸は、同じワープの前側で終わっています。それぞれのヨコ糸は、端を割いて、二つのテールに分かれている状態です。
写真2と3:緑のヨコ糸からテール処理をします。二つに割いた一方のテールをワープの前側に回して、後ろ側に通します。写真のようにウィービング用の針を使うと、ワープの間にヨコ糸を通しやすくなります。
写真4:緑のヨコ糸のもう一方のテールはそのまま後ろ側に流したら、テール処理完成です。
写真5:赤紫のヨコ糸のテール処理をします。二つに割いた一方のテールは、一番端のワープの後ろを回って、前側に出します。
写真6~9:赤紫のヨコ糸のもう一方のテールは、二番目のワープの後ろを回って、前側に出し、そのあと、三番目のワープの前側を回って、後ろ側に通します。
写真10:赤紫のヨコ糸の最初のテールは、一番端と二番目のワープの間にありますが、二番目のワープの前側を通って、後ろ側に通します。
写真11:緑のヨコ糸と赤紫のヨコ糸でのテール処理の違いが確認できます。
写真2~11では、ヨコ糸の下側に通してテール処理をしましたが、写真12のように、ヨコ糸の上側に通してテール処理をすることもあります。例えば、上側でも同じ色のヨコ糸で織る場合は、上側にテールを通してもいいと思います。
テールを下側に通すときは、針を使わないと、通すのが難しいと思います。一方、テールを上側に通す場合は、針を使わなくても指で簡単にワープに巻き付けることができます。
3. Tailing inside the body part | 本体部分の内側でのテール処理
If you are tailing on the inside of the body part rather than the leftmost or rightmost warp, there are several possible ways to do it. Below are three different methods I usually use.
ワープの左右の端ではなく、内側でテール処理する場合は、いくつかの方法が考えられます。私が普段行う方法は、3種類あります。


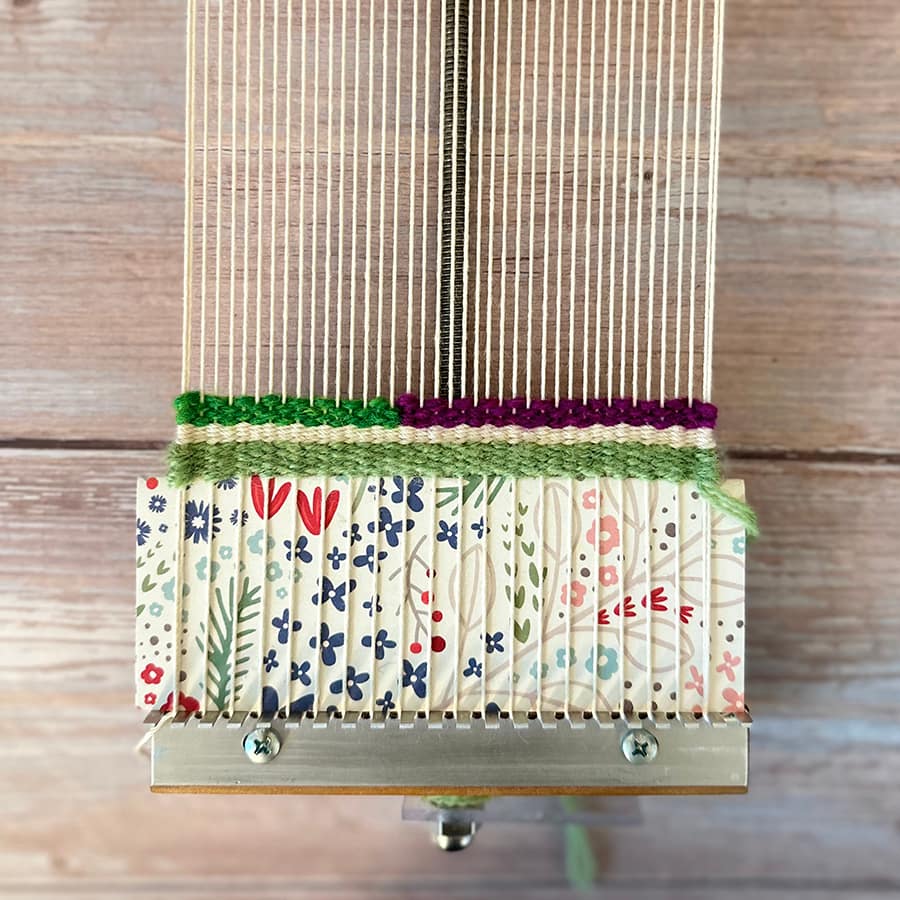


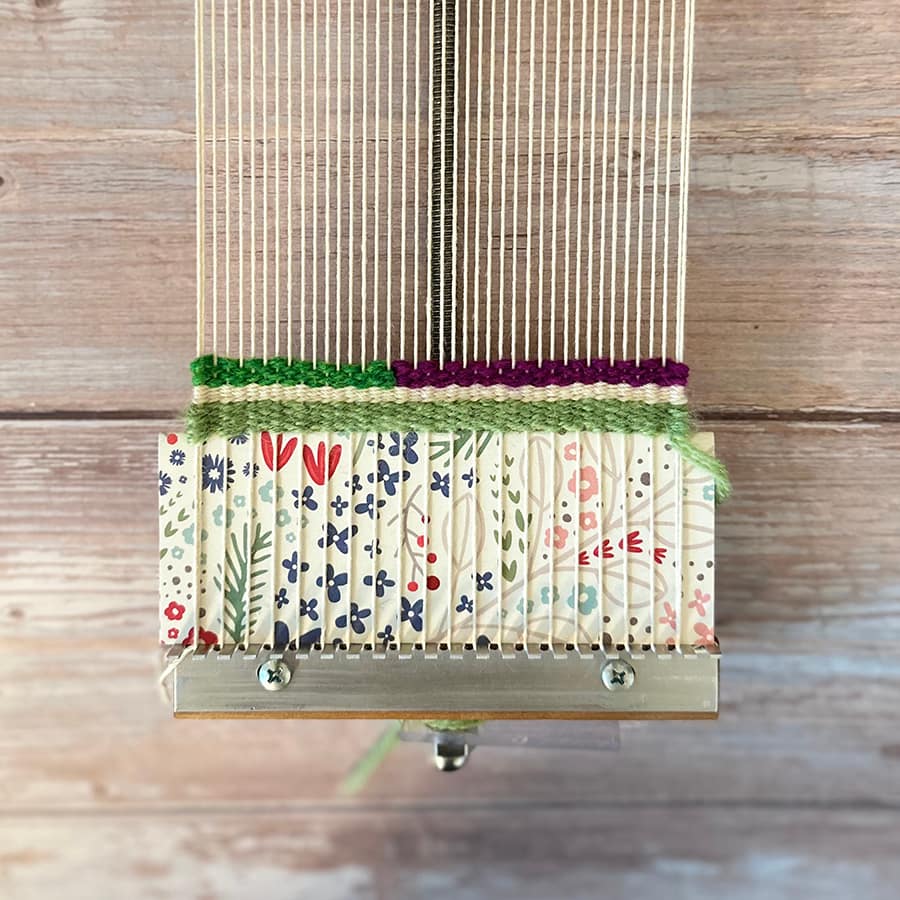


Here tailings will be done in the situation shown in photo 1. The green weft ends at the back of the warp, and the dark purple-pink weft ends at the front of the warp. Both ends are split in two and once through to the back side.
As method 1 for tailing, wrap one of the tails of the green weft around the warp next to the right, as shown in photo 2. One of the tails of the dark purple-pink weft is also wrapped around the warp next to the right.
As you can see in the enlarged version of photo 2, the orange circles show the wrapped tails. Here, the tails are wound from the lower side of the weft.
Photo 3 shows the tailing completed using this method 1.
As method 2 for tailing, wrap one tail of each weft once more around the warp that was last threaded, as shown in photo 4.
As you can see in the enlarged version of photo 4, the orange circles show the wrapped tails.
Photo 5 shows the tailing completed by this method 2.
As method 3 for tailing, after each weft is split in two, as shown in photo 6, pass one tail of each weft through the back side at the two previous warp thread, and then, as shown in photos 7-9, thread it through from the opposite side of the other tail so that it wraps around the endpoint warp.
Photo 10 shows the tailing completed by this method 3.
ここでは、写真1にあるような状況でテール処理をします。緑のヨコ糸は、ワープの後ろ側で終わっていて、赤紫のヨコ糸は、ワープの前側で終わっています。両方とも端を二つに割いて、一旦後ろ側に通しています。
テール処理の方法1として、写真2にあるように、緑のヨコ糸のテールの一方を右隣りのワープに巻き付けます。赤紫のヨコ糸のテールの一方も、右隣りのワープに巻き付けます。
写真2の拡大版でわかるように、オレンジで囲った部分が、巻き付けたテールです。ここでは、ヨコ糸の下側から巻き付けています。
写真3は、この方法1でテール処理が完了した状態です。
テール処理の方法2として、写真4にあるように、それぞれのヨコ糸のテールの一方を最後に通したワープにもう一回巻き付けます。
写真4の拡大版でわかるように、オレンジで囲った部分が巻き付けたテールです。
写真5は、この方法2でテール処理が完了した状態です。
テール処理の方法3として、写真6にあるように、それぞれのヨコ糸を二つに割いたあと、一方のテールは、二つ前のワープで後ろ側に通します。そのあと、写真7~9のように、もう一方のテールの反対側からワープに巻き付くようにテールを通します。
写真10が、この方法3でテール処理した状態です。
4. Splicing the weft | ヨコ糸の継ぎ目
Already explained how to splice the weft in a previous article “Mastering Plain and Tapestry Weaving with a Sample“, the ends of the weft on the ending and beginning sides were each divided into two tails, and one tail of the ending weft was overlapped on top of the other tail of the beginning weft.
ヨコ糸の継ぎ目については、以前の記事「サンプルを使って平織りとタペストリー織りをマスターする」で説明しました。そこでは、終わる側と始まる側のヨコ糸の端をそれぞれ二本のテールに割き、お互いの一本と一本を重ね合わせました。
Here is another example which is using weft with three strands bundled together. The idea is simple, if there are three tails, just divide them into two tails and one tail (see photo 1).
Photo 2: If two tails of one weft are passed through the front side of the warp, only one tail of the other weft is passed through to the front side of the same warp. The other tails that are not passed through to the front of the warp will be passed through to the back of the warp.
In photo 3, they appear as if they are connected.
ここでは、3本が束になったヨコ糸を使う例を紹介します。考え方はシンプルで、3本のテールがある場合は、二本と一本に分けるだけです(写真1)。
写真2:一方のヨコ糸のテール二本がワープの前側を通った場合は、もう一方のヨコ糸のテールは一本だけワープの前側に通します。ワープの前に通さなかったテールは、そのまま後ろ側に通します。
写真3では、まるでつながっているかのように見えます。
5. Three or more tailings | 三本以上のテール処理
Here are examples with three or more tails.
テールが3本以上ある場合の例も紹介します。
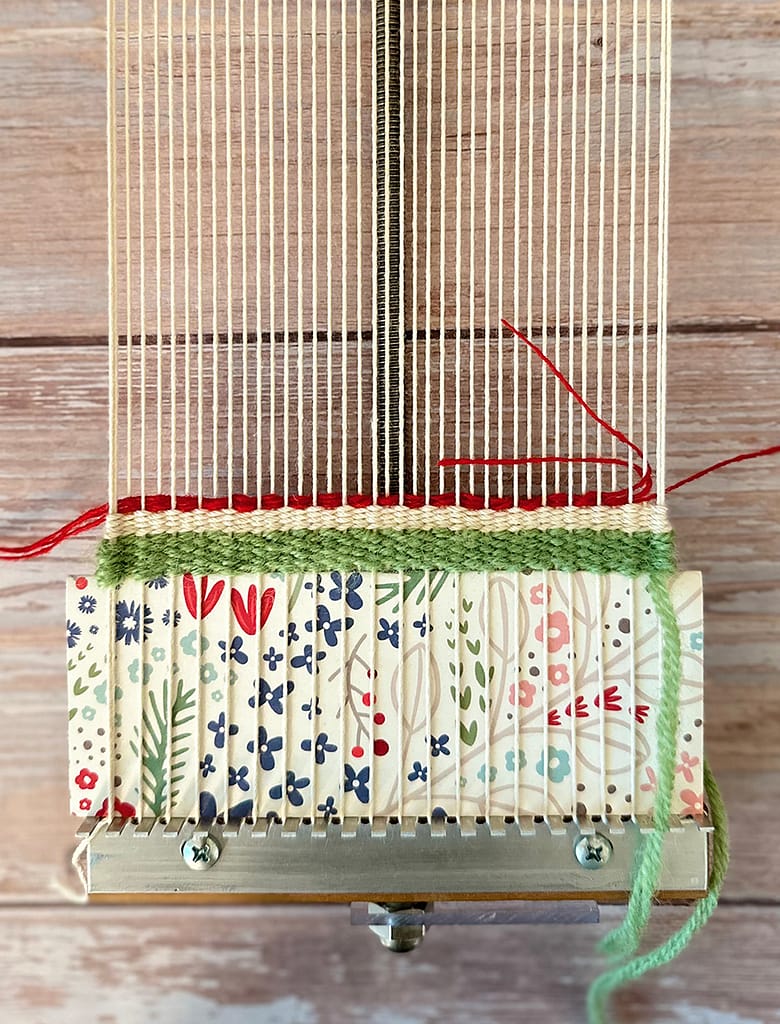
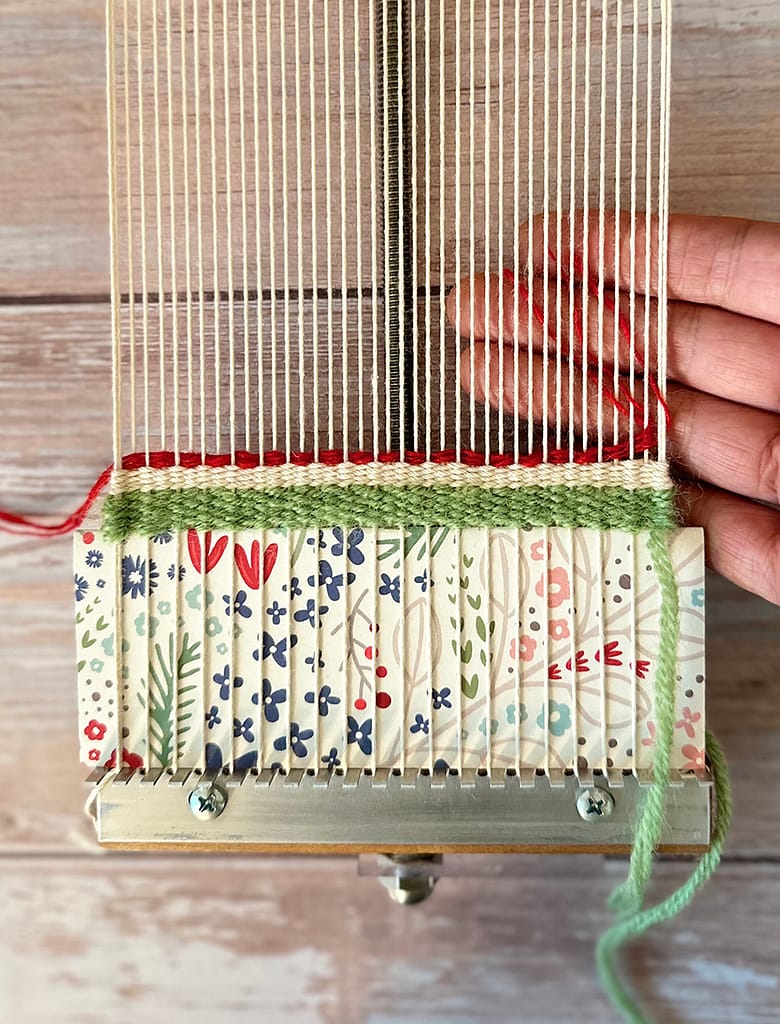
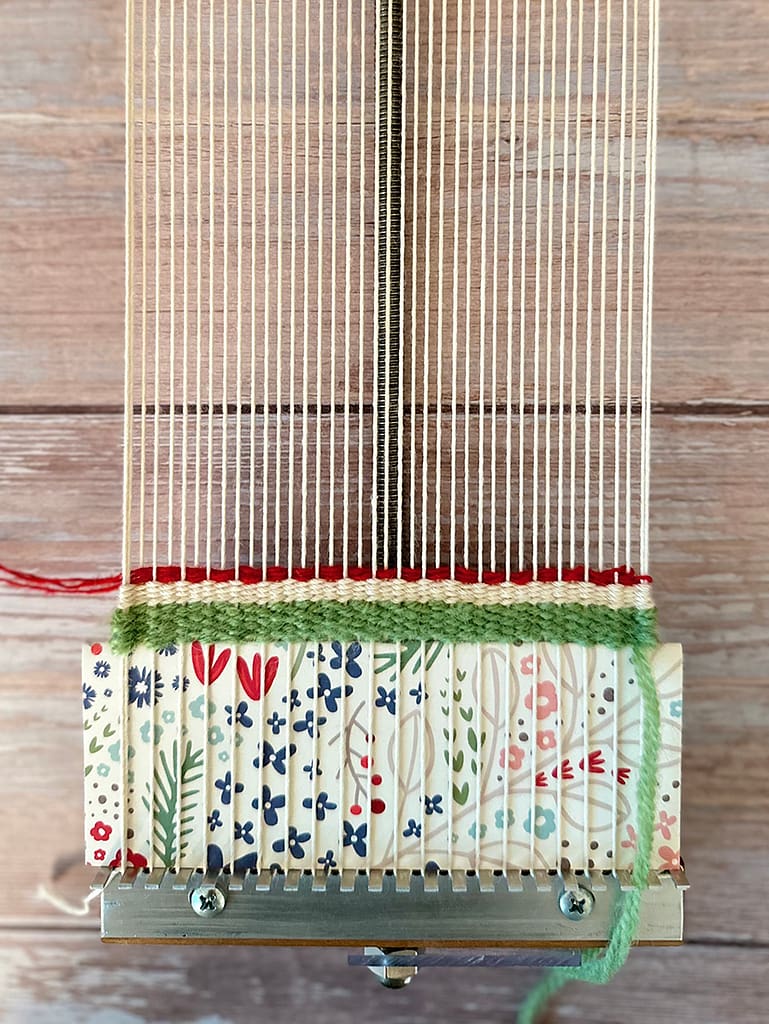
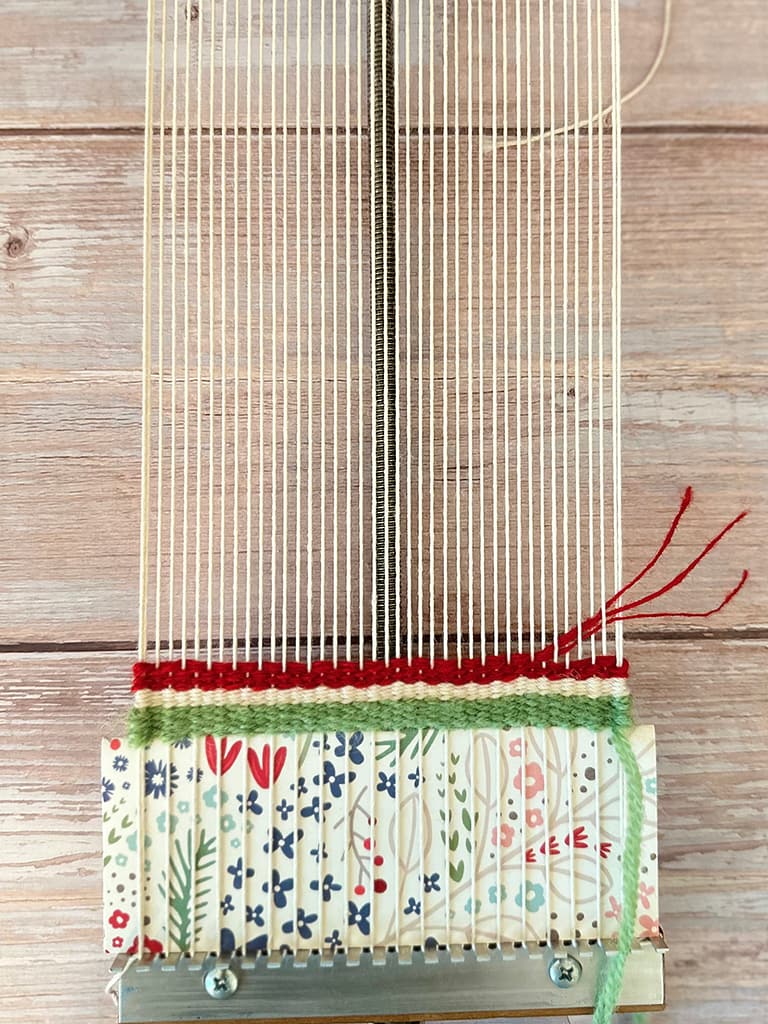
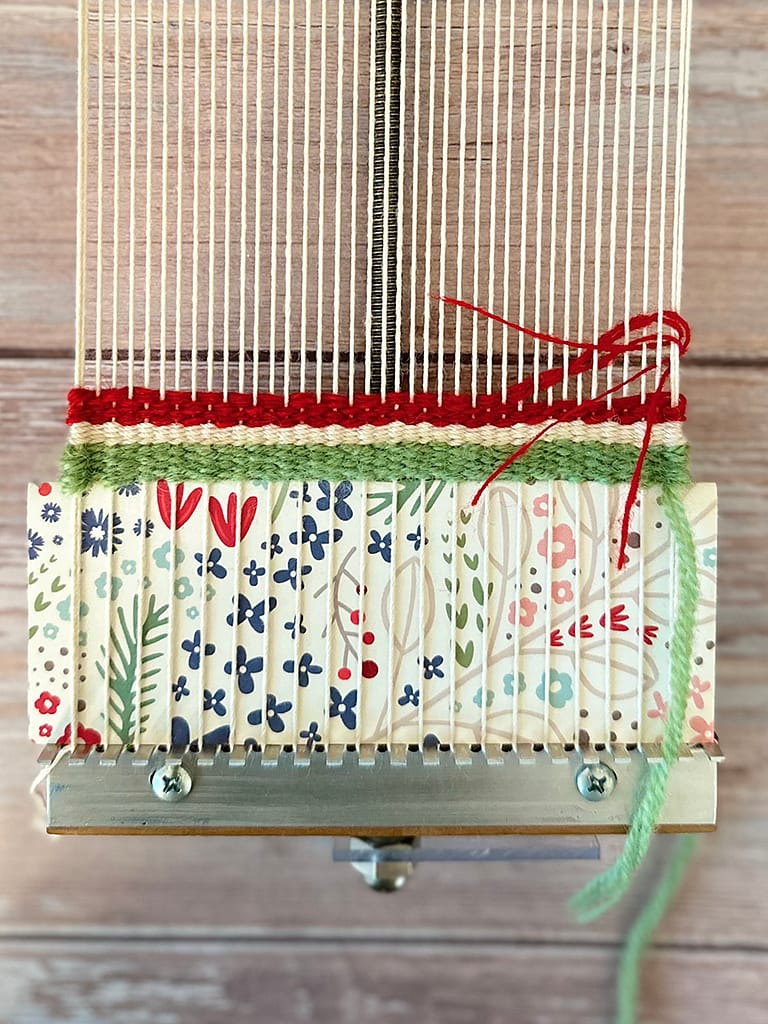
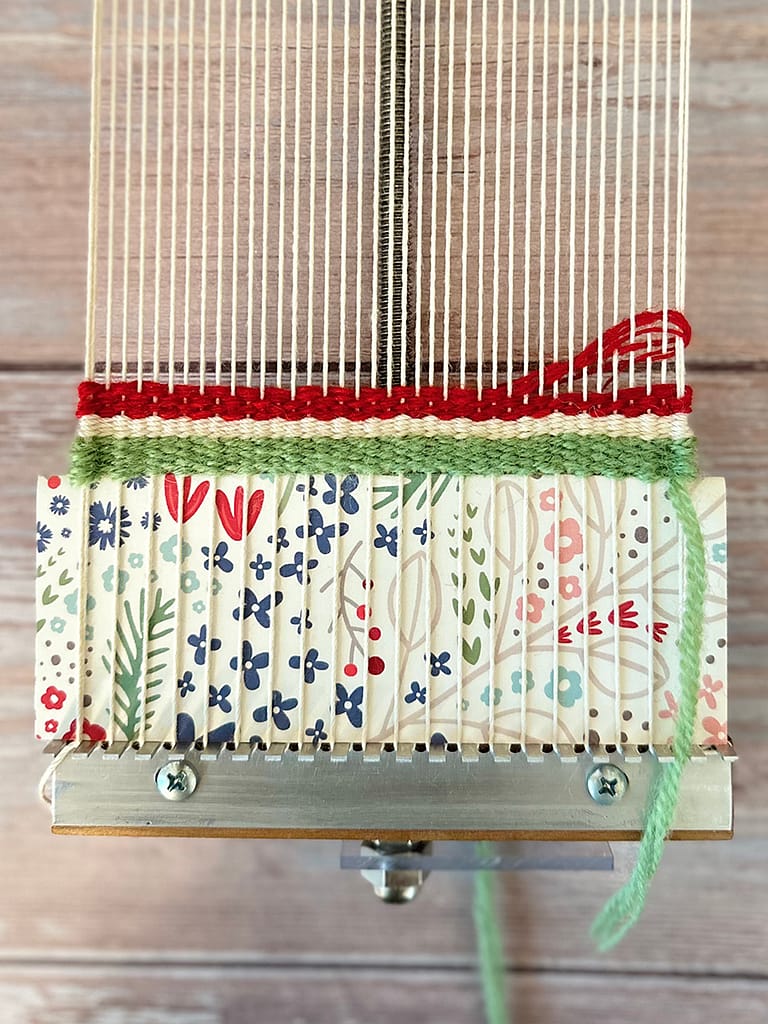
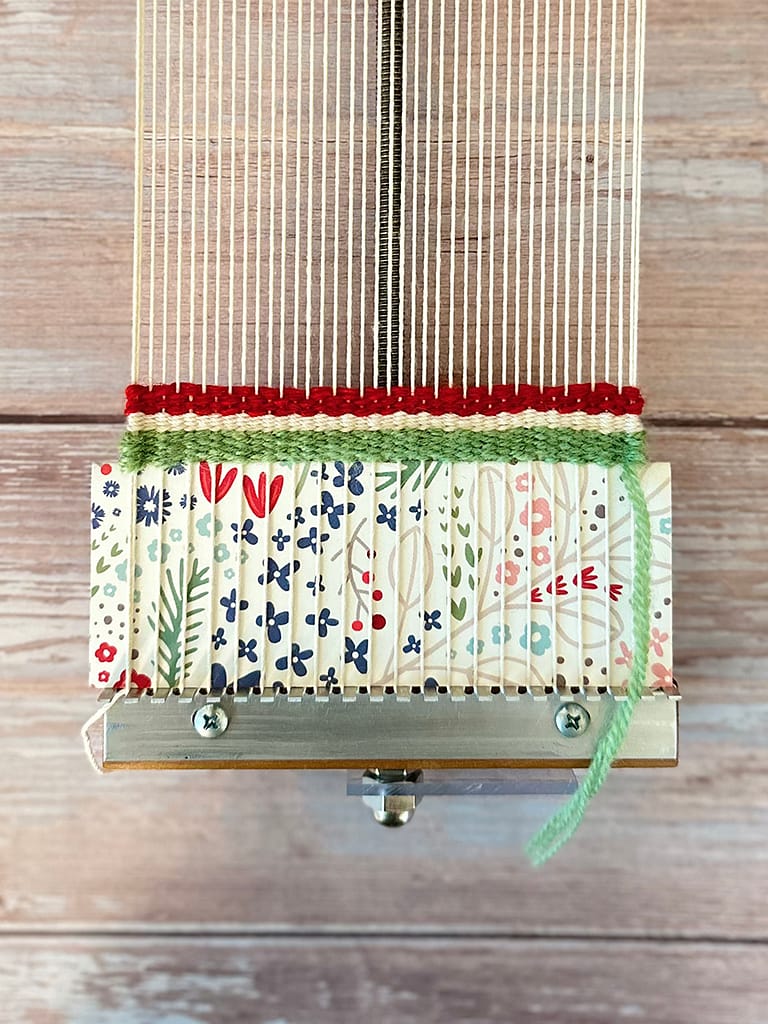

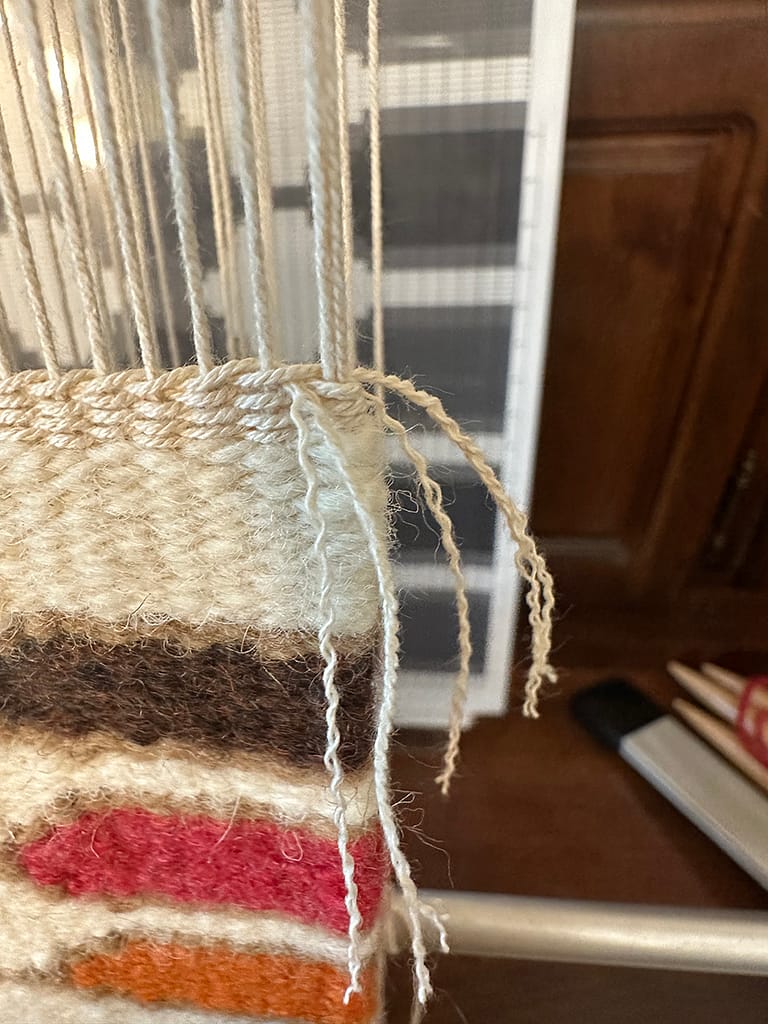


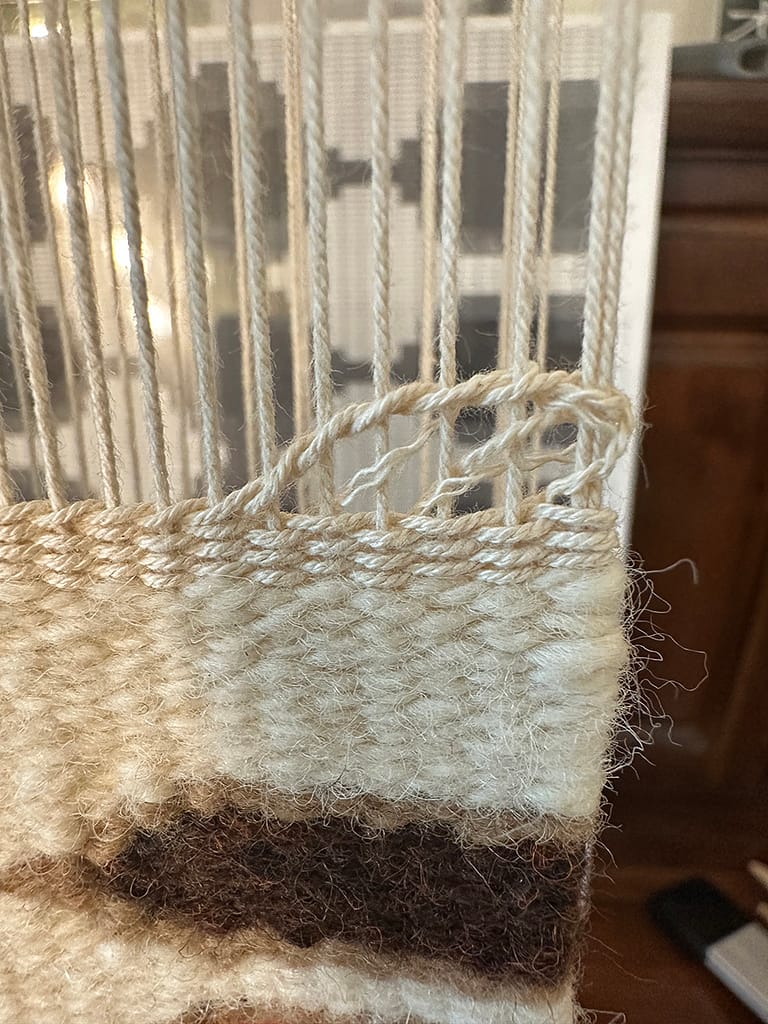
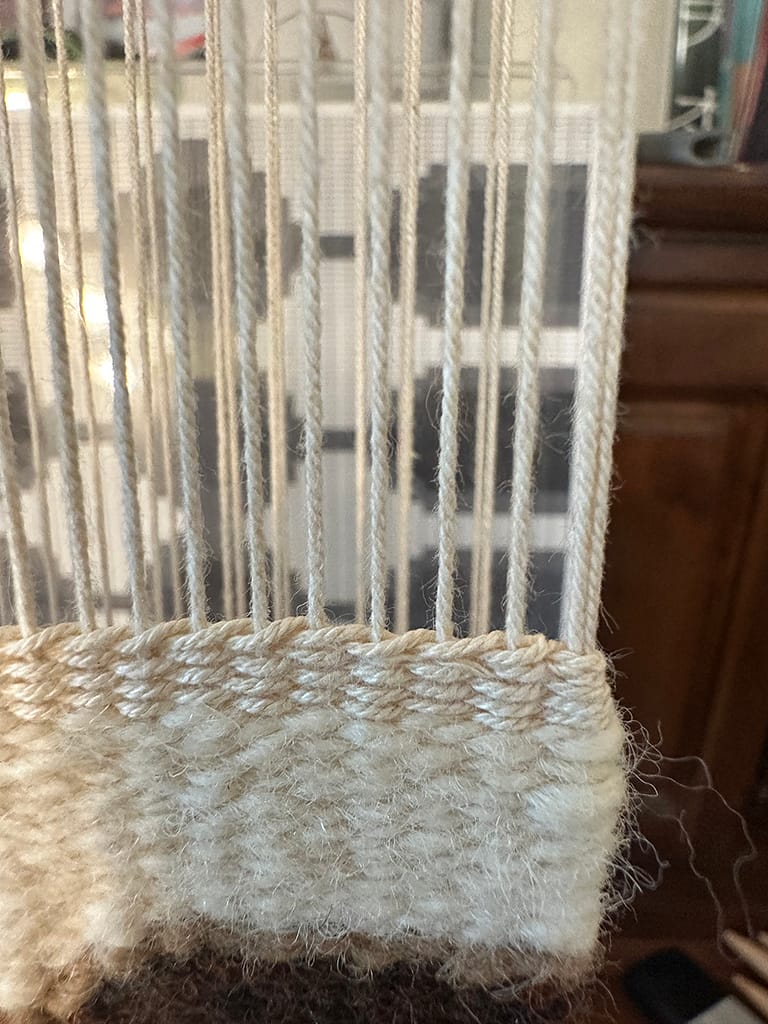

If the weft ends at the back of the warp, it is easy; just wrap one of the tails around the warp (photos 1-3).
If the weft ends at the front of the warp, pass each tail through front to back, starting with the second warp from the end, the third warp and the fourth warp. See photos 4-6.
Photo 7 completes the tailing.
Photos 8-15 show an example with four tails. I do this four-tail process at the end of weaving the top header with the twining technique after the body is completed.
See also the following article for the steps in weaving the top header.
At the end of the twining weave, two warp yarn ends remain. Each is split in two for a total of four tails. Refer to the photos to see where to thread the tails. As you can see in Photo 15, each tail is swept back through the front side of the different warps.
ヨコ糸がワープの後ろ側で終わっている場合は、簡単で、テールの一本だけをワープに巻き付けます(写真1~3)。
ヨコ糸がワープの前側で終わっている場合は、テールの一本一本をそれぞれ順番に、端から二番目のワープ、三番目のワープ、四番目のワープの前を通って後ろに流します。写真4~6を参照してください。
写真7でテール処理が完了しました。
写真8~15は、テールが4本ある例です。私は、本体が完成したあとに、上側のヘッダーをトワイニング技法で織った最後に、このような4本のテール処理を行います。
上側のヘッダーを織るステップについては、以下の記事も参照してください。
トワイニング織りの終点で、二本のワープ糸の端が残ります。それぞれを二つに割き、合計4本のテールとなります。テールを通す箇所は、写真を参考にしてください。写真15でわかるように、それぞれのテールは、異なるワープの前側を通って後ろに流されています。
The video shows how to split the warp thread using a weaving needle for reference. Untwist the warp thread slightly (whether to untwist to the right or left depends on the thread) and place the needle in the middle of the untwisted thread to split it.
ビデオでは、ワープ糸をウィービング用の針を使って割くやり方がわかりますので、参考にしてください。ワープ糸を少しねじって(右にねじるか左にねじるかは、その糸によって異なります)、ほどかれた真ん中に針を置いて割いていきます。
That’s all my explanation of how I usually do the tailing.
I don’t think there is any strict rule that says you must do this as long as tails are fixed. Do it in a way that is easy for you.
Thank you for reading to the end!
以上、私が普段行うテール処理のやり方を説明してきました。
テールが固定されていれば、必ずこうするべきという決まりはないと思っています。やりやすい方法で行ってみてください。
最後まで読んでいただき、ありがとうございます。