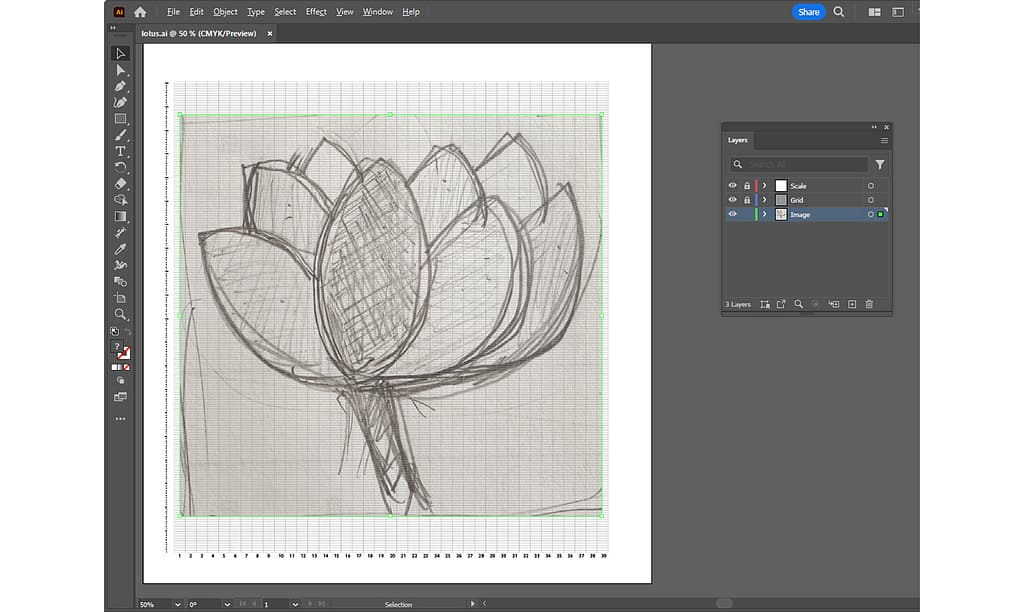
What medium do you use as the basis for your weaving designs? They may be pencil drawings on paper, or photos taken on the street.
In this article, I will introduce to the initial process of applying a design to a grid for weaving, using the Adobe Illustrator grid template created in the previous article “Creating a Grid Template in Adobe Illustrator“.
The general steps are as follows:
- Turn your drawing or photo into an image format
- Create a layer for a rough sketch on a grid template in Illustrator
- Place the image on the layer
- Save the file as a different name
Each of these steps is described below.
手織り用のデザインを作るときに、どんな媒体をもとにしていますか?紙と鉛筆でデッサンした絵だったり、道端で撮った写真だったりするのではないでしょうか。
この記事では、前回の記事「アドビ イラストレーターで作るグリッドテンプレート」で作成した Adobe Illustrator のグリッドテンプレートを使って、デザインを手織り用のグリッドに当てはめていく最初の作業について説明します。
大まかな手順としては、以下になります。
以下にそれぞれの手順を説明していきます。
1. Turn your drawing or photo into an image format | 手描きまたはデジタルの下絵を画像フォーマットにする
This time I will use a drawing of the lotus flower and import it into Illustrator as a rough sketch.
今回は、蓮の花のデッサンを使って、下絵として Illustrator に取り込んでいきたいと思います。
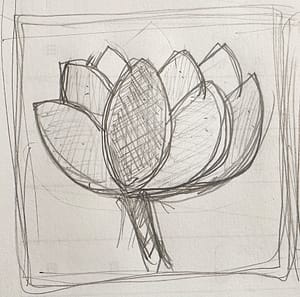
- Take a picture of the drawing with a camera such as a smartphone.
- Send that photo to your computer. You can send it to yourself as an email attachment or save it to cloud storage.
- If you only have one photo, it is easier to send it by email.
Open the email on your computer and download the attachment. - If the file format is JPEG, JPG, HEIC or HEIF, it can be imported into Illustrator as an image format.
- デッサンした絵をスマホなどのカメラで写真にします。
- その写真をコンピュータに送ります。送る方法は、自分宛てにメールの添付で送ったり、クラウドのストレージに保存する方法などがあります。
- 写真が一つだけならメールで送る方が簡単です。
送ったメールをコンピュータで開き、添付ファイルをダウンロードします。 - ファイルフォーマットが、JPEG、JPG、HEIC または HEIF であれば、画像フォーマットとして Illustrator に取り込み可能です。
2. Create a layer for a rough sketch on a grid template in Illustrator | Illustrator でグリッドテンプレートに下絵用のレイヤーを作成
Before placing an image, create a layer for the image.
画像を配置する前に、画像用のレイヤーを作成しましょう。
- Select File menu – Open in Illustrator and open the grid template created in the previous article.
- Illustrator のファイルメニュー/開く を選択し、前回の記事で作成したグリッドテンプレートを開きます。
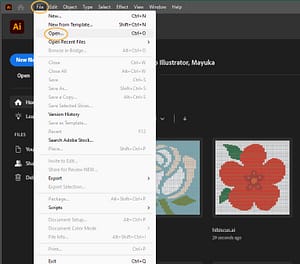
- Click Create New Layer in the Layers panel. “Layer 3” will be created.
- レイヤーパネルで新規レイヤーを作成をクリックします。「レイヤー 3」が作成されます。

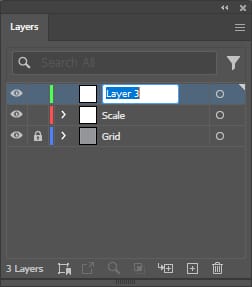
- Rename it to something easy to understand, such as “Image“, “Sketch” and so on.
- 「レイヤー 3」を「イメージ」、「下絵」などわかりやすい名前にします。
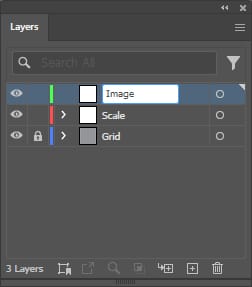
- Select the image layer you just created and drag it under the grid layer.
Lock the scale layer so that only the image layer is editable.
- 今作ったイメージレイヤーを選択し、グリッドレイヤーの下にドラッグします。
目盛のレイヤーをロックして、イメージレイヤーのみ編集可能な状態にしておきましょう。
3. Place the image on the layer | 下絵のレイヤーに画像を配置
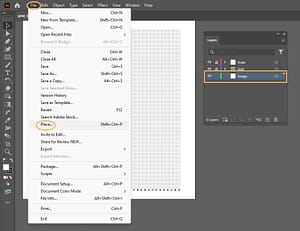
- With the image layer selected, select File menu / Place and choose an image file saved on your computer.
- イメージレイヤーが選択されている状態で、ファイルメニュー/配置 を選択し、コンピュータに保存した画像ファイルを選択します。
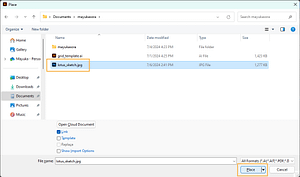
- Click in the upper left corner on the artboard to place the image there.
If the image is too large, shrink the screen and adjust the size of the image.
When resizing an image, click the lower right corner of the image with your mouse and move it to the upper left to make the image smaller. If you do this while holding down the shift key on the keyboard, the image can be resized while maintaining the aspect ratio.
- アートボード上の左上をクリックすると、そこに画像が配置されます。
画像が大きい場合には、画面を縮小して、画像のサイズを調整します。
画像のサイズ調整時には、画像の右下の角をマウスでクリックして、左上に移動すると画像が小さくなります。このとき、キーボードの shift キーを押しながら行うと、縦横比が保持されたまま画像のサイズを変更することが可能です。
- To crop the image, right-click on the image and select Crop Image.
Adjust the image frame and press Enter on the keyboard to confirm the crop.
- 画像を切り抜きたいときには、画像上を右クリックして、画像の切り抜きを選択します。
画像の枠を調整して、キーボードの Enter キーを押して切り抜きを確定します。
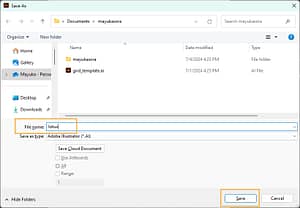
4. Save the file as a different name | ファイルを別名保存
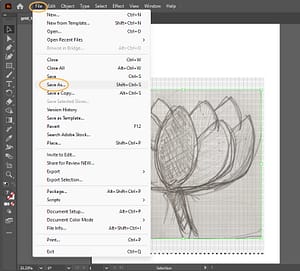
Let’s save the file as a separate file from the template.
Select File menu – Save As.
Give it a name that is easy to understand and save it.
テンプレートとは別のファイルとして保存しましょう。
ファイルメニュー/別名で保存を選択します。
わかりやすい名前を付けて保存してください。
This is the end of this article.
In the next article, I will introduce you to the process of creating a rough grid design.
Thank you for reading to the end!
今回の記事はここまでとなります。
次回の記事では、ラフなグリッドデザインを作っていく作業について説明したいと思います。
最後まで読んでいただき、ありがとうございます。