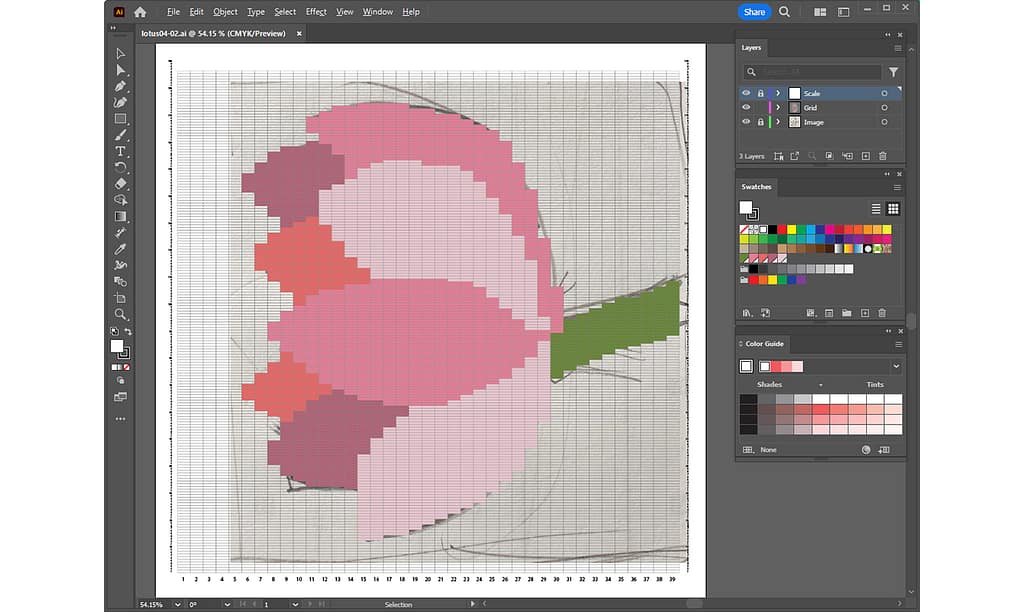
Have you ever heard of pixel art? It is a picture composed of small squares, an art form reminiscent of early computer and video game screens.
The process from here is similar to the process of creating pixel art. Pixel art is created in square, whereas a weaving grid consists of long horizontal rectangles. These rectangles will be used to create pixel art.
In this article, I will show you how to use a rough sketch imported into Adobe Illustrator to apply color to the grid.
First of all, let me say that this work will require a little patience, but I would be happy if you could stay with me until the end.
For previous articles, please refer to the following links:
- [1] For basic information and basic operations of Illustrator, Adobe Illustrator for Weaving Grid Design
- [2] For information on how to create a grid template, Creating a Grid Template in Adobe Illustrator
- [3] For information on how to import a rough sketch, Placing a Rough Sketch in Adobe Illustrator
The general procedure for this work is as follows:
1. Move, rotate and position the rough sketch
In the previous article, the process of importing the rough sketch has been completed.
This time, we will start by moving and rotating this rough sketch to determine the position and angle at which it will be placed for actual weaving.
- Select Open from the File menu to open the previously saved file.
- Zoom in or out as needed to see the entire artboard.
Shortcut keys for zooming in/out and moving the screen:
- When selecting the Zoom tool, press “Z” on the keyboard to switch to the Zoom tool. In addition to this method, if you wish to use the Zoom tool temporarily, press “Spacebar + Command” on Mac or “Ctrl + Spacebar” on Windows to change to the Zoom In tool. To zoom out, press “Spacebar + Command + Option” on Mac or “Ctrl + Alt + Spacebar” on Windows.
- Use the Hand Tool as a tool to move the artboard. Press “H” on the keyboard to switch to the Hand tool. In addition to this method, if you want to temporarily switch to the Hand tool, press the space bar on the keyboard.
- When selecting the Zoom tool, press “Z” on the keyboard to switch to the Zoom tool. In addition to this method, if you wish to use the Zoom tool temporarily, press “Spacebar + Command” on Mac or “Ctrl + Spacebar” on Windows to change to the Zoom In tool. To zoom out, press “Spacebar + Command + Option” on Mac or “Ctrl + Alt + Spacebar” on Windows.
- Three layers are currently created. Only the image layer on which the rough sketch is placed will be edited. Lock all layers except the image layer.
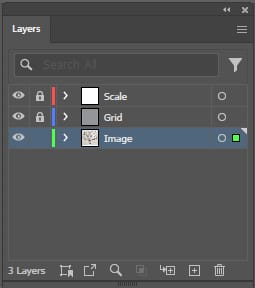
- Select the Selection tool and click on the image to select it.
Move the mouse over any of the four corners, and when the rotation mark (rounded arrows) appears, you can rotate the image.
To change the size of the image, move the mouse over any of the four corners, and when the scaling mark (straight arrows) appears, you can change the size of the image. If you do this while holding down the Shift key on the keyboard, the aspect ratio will be preserved.
Drag to adjust the position of the image.
In the sample lotus flower, the image was rotated 90 degrees and placed horizontally to minimize the slits (vertical lines) when weaving. Now the rough sketch image is positioned.
2. Select your favorite colors in the Color Guide and save them to the Swatches
Next, select some of your favorite colors from the Color Guide and save them in the Swatches panel.
- Select Color Guide from the Window menu to display the Color Guide panel.
- If the Swatches panel is not displayed, select Swatches from the Window menu as well.
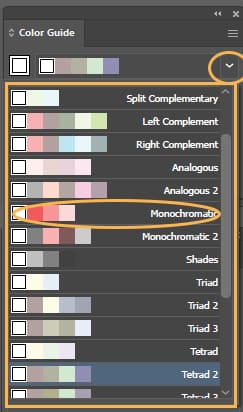
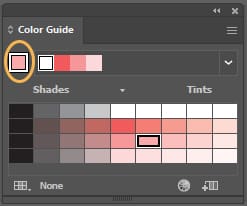
- Click the Harmony Rules (down arrow) in the Color Guide panel to display a list of color groups. Select your favorite color from this list.
In the sample, the Monochromatic color group is selected.
- When a color group is selected, the color variations are displayed in the Color Guide. Double-click on a color you want.
In the sample, I double-clicked the circled pink.
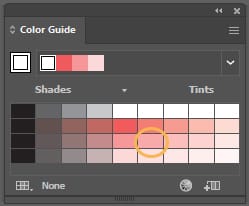
- The color you just double-clicked is applied to the upper left-most frame of the Color Guide.
At the same time, the same fill will be applied to the Swatches panel. Click on New Swatch.
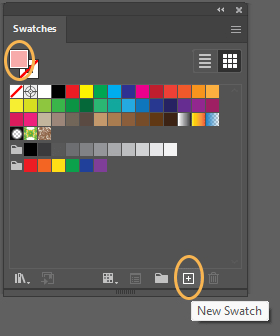
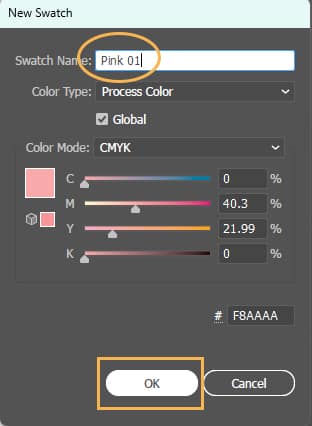
- Give the color an easy-to-understand name and click OK.
The color is now registered in the Swatches panel.
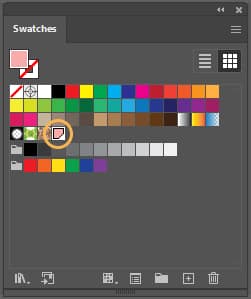
- Repeat the same procedure to register several colors to the Swatches.
You may have several weft colors. It will be fun to register colors as you think about which colors to weave with.
Here we will create a rough design. I will explain the process of thinking about and modifying colors in another article, so please register your favorite colors or colors you would like to use.

3. Selecting and coloring multiple grid rectangles at once
Once the colors have been registered, the next step is to apply them to the rectangles of the grid, which can be a time-consuming process depending on the design. At this point, I would like to select and color as many rectangles as possible at once in the following steps:
- Only the grid layer should be editable. Lock the Image layer and unlock the Grid layer.

- Beginning with the bottom petal, add color. Zoom in on the screen until the inside of the grid rectangles is clearly visible.
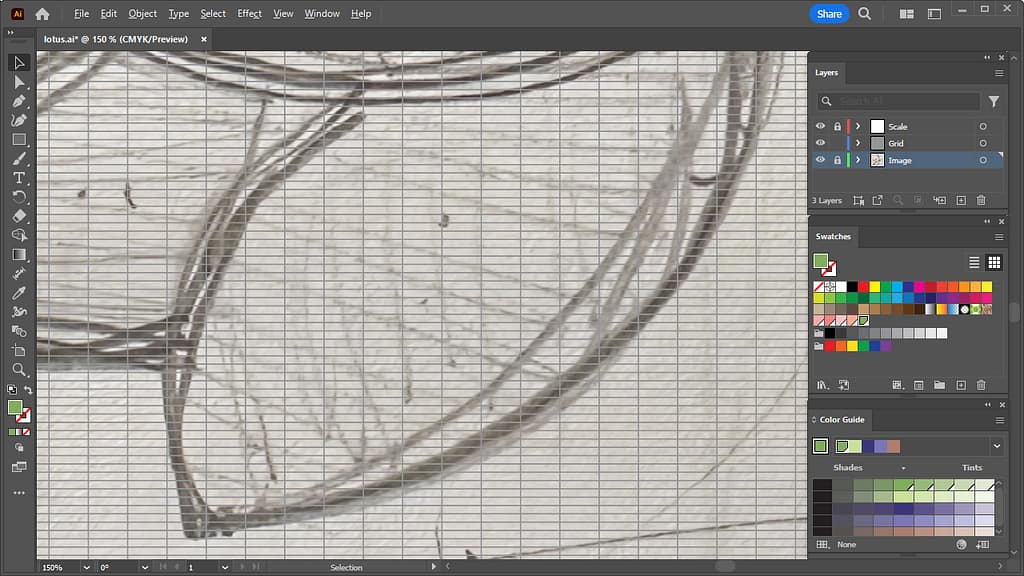
- With the Selection tool, place the mouse tip inside the grid rectangle. At this point, make sure that only the arrow on the mouse tip is visible, click and drag down.
This will allow you to select multiple vertical rectangles at once.
This is only possible because the rectangles’ fill is set to None (transparent) when the grid template is created. If the rectangles’ fill is colored, the rectangle will move when you click and drag it.
For information on how to create a grid template, see “Creating a Grid Template in Adobe Illustrator“.
If the rectangle has moved, select Undo Move from the Edit menu.
Alternatively, use the keyboard shortcut keys Command + Z for Mac or Ctrl + Z for Windows to undo.
If the selection does not work, click on an empty area of the artboard and reselect it again.
- With multiple rectangles selected, select a color registered in the Swatch panel.
- Then select multiple rectangles vertically in the next column as well, and apply the same color. Repeat until the first petal is colored.
- After repeating the above process, eight lotus petals and the stem were colored.
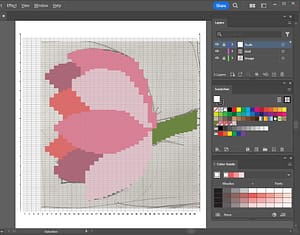
4. Save the file
Once here, choose Save from the File menu to overwrite the file.
Failed version
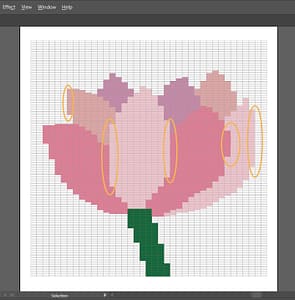
Actually, when I filled in the grid the first time, I did not turn the lotus flower sideways, and colored it in the same orientation as the drawing. The following image shows how it looked like at that time.
Imagining what it would be like when actually weaving, I noticed that vertical slits would occur in several places. I felt that this would be difficult when weaving.
Therefore, this article presents the procedure for creating a grid design with the lotus flower rotated 90 degrees to face sideways.
I hope this will be helpful as an example when considering the orientation of the design.
In this article, we worked on creating a rough grid design.
In the next article, I will show you how to adjust the grid design, considering the weft pathways when actually weaving.
Thank you for reading to the end!