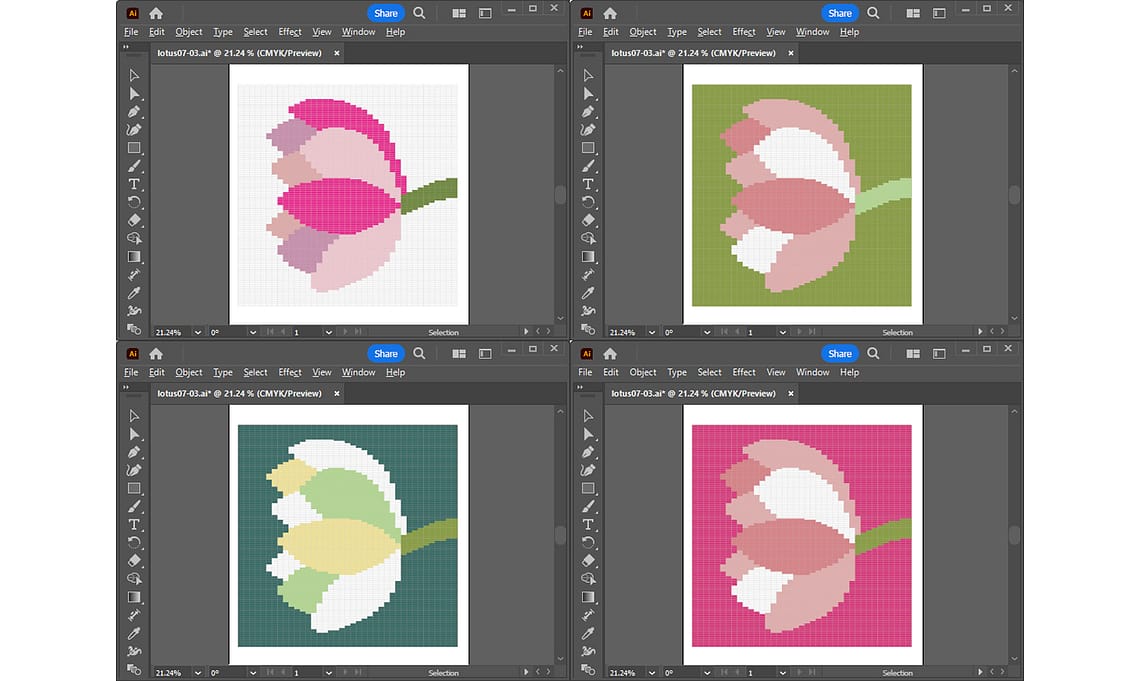
The work so far may have been all about details: creating and adjusting the grid design, registering colors as close as possible to the color of the weft, and so on.
This time around, I will explain the process of coming up with a color scheme for a grid design. It is not as detailed as previous tasks. I believe the work will make us realize how wonderful the software is.
For previous articles, please refer to the following links:
- [1] For basic information and basic operations of Illustrator, Adobe Illustrator for Weaving Grid Design
- [2] For information on how to create a grid template, Creating a Grid Template in Adobe Illustrator
- [3] For information on how to import a rough sketch, Placing a Rough Sketch in Adobe Illustrator
- [4] For information on how to create a rough grid design, Coloring on the Grid in Adobe Illustrator
- [5] For information on how to adjust the grid design, Adjust Grid Design for Easy Weaving (Work in Adobe Illustrator)
- [6] For information on how to register colors close to the weft, Matching Weft Colors for Grid Design in Adobe Illustrator
In this article, the following items will be explained to complete the grid design.
1. Master the use of layers
In previous articles, I have explained several times the following functions of the Layers panel:
- Create New Layer
- Lock layers
- Show and hide layers
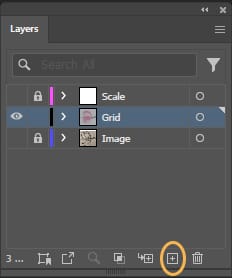
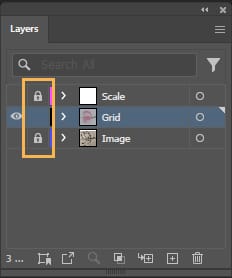
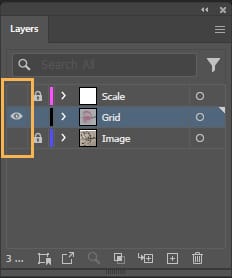
In addition to the above functions, here is another way to use layers that you should know in order to come up with an efficient design. The steps are as follows:
- Select Open from the File menu and open your grid design file.
- In the Layers panel, hide and lock all layers except the Grid layer. Only the Grid layer will be visible and ready for editing.
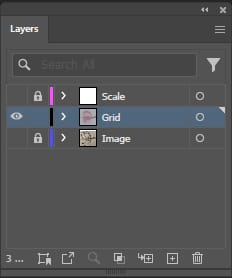
- Select the Grid layer and click Create New Layer. An empty layer will be created above the grid layer.
In this example, I will name the new layer “Color 01“.

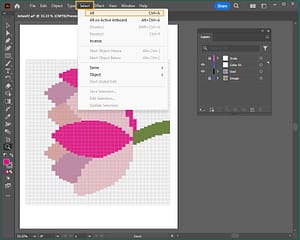
- Select All from the Select menu.
Or use the shortcut keys Command + A for Mac or Ctrl + A for Windows.
- Select Copy from the Edit menu.
Or use the shortcut keys Command + C for Mac or Ctrl + C for Windows.

- Select the “Color 01” layer in the Layers panel, then select Paste in Place from the Edit menu.
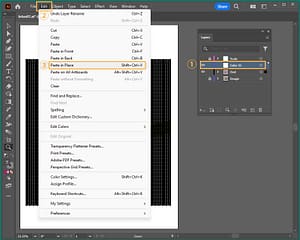
- The same objects as the grid layer are now pasted to the “Color 01” layer.
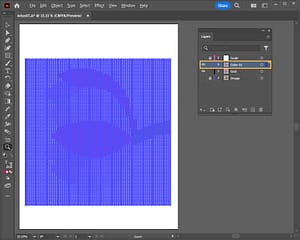
- When the grid layer is hidden and only the “Color 01” layer is displayed, you will see the same objects as the grid layer are pasted in the same position.
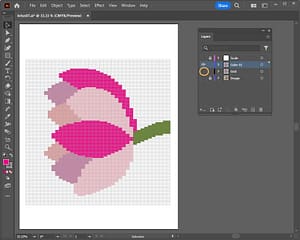
In the next section, let’s work on the color scheme in the “Color 01” layer.
2. Efficiently change the color scheme of a grid design
Now, open the swatch library that you registered in the previous article “Matching Weft Colors for Grid Design in Adobe Illustrator” and use the registered weft colors to work on the color scheme.
- Select Open Swatch Library > Other Library from the menu in the upper right corner of the Swatches panel.
- Select and open the swatch library file we saved to open the swatch library panel.
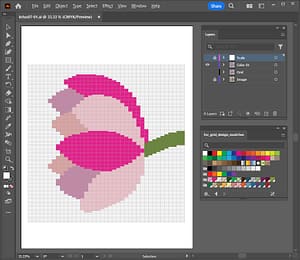
Let’s work on the color scheme using the colors in the swatch library. The figure on the left is before the change. From now on, the color scheme will be as shown in the figure on the right.

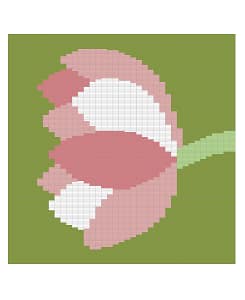
2-1. Select all objects of the same color at once and change the color
First, I will change the background color to yellowish green and the stem color to light green. I will use the method of selecting the rectangles of each part at once.
Steps are listed below the video.
- In the “Color 01” layer, select some background rectangles.
- Go to the Select menu – Same – Fill Color.
- Only the background rectangles are selected. Double-clicking the yellow-green from the swatch library applied the color to the background.
- Similarly, change the stem green to light green. Follow the same step to select any of the stem rectangles.
- Go to the Select menu – Same – Fill Color.
- Select light green in the swatch library and apply the color.
In this way, you can select several rectangles at once and change their colors.
2-2. Advanced object selection
The next steps are to change the color of each petal. Selecting petals of the same color and locking objects around them makes it easier to select individual petals.
Steps are listed below the video.
- Select any of the top petal rectangles and go to the Select menu – Same – Fill Color.
- Open the Select menu again, this time choose Inverse.
- Now all but the dark pink petals are selected.
- Open the Object menu and choose Lock – Selection.
- Now all objects except the dark pink petals are locked, making it easier to select the dark pink petals.
- First, select the lower side dark pink petal. Drag with the Selection tool to select a portion, then hold down the Shift key on the keyboard to select the rest.
The Shift key can be used to select another object while also preserving the current selection. - Then select the pink from the swatch library and apply the color.
- Similarly, select the other dark pink petal on the upper side several times using the Shift key and select light pink from the swatch library.
- After these two petal color changes are done, unlock the object lock. Open the Object menu and select Unlock All.
The remaining petals will be recolored in the same steps.
The color scheme for Color 01 is completed as shown in the figure below.

3. Consider multiple color schemes and compare them in layers
Once the first color scheme is created, it is fun to repeat the same steps to come up with another color scheme.
In the steps described in Procedure 1, create a layer for another color scheme, and in the steps described in Procedure 2, change the colors all at once.
In the sample, I added two more color schemes.
You can also show or hide each layer in the Layers panel to compare the color schemes.
Watch the video below to see the steps.
In addition to comparing in layers, you can also compare side-by-side on one screen by displaying new windows.
Steps are described below the video.
- Display the “Color 01” layer and select New Window from the Window menu to open another window.
- Drag a tab on the newly opened window to detach it from the first window.
- By displaying “Color 02” in the Layers panel on the separated window, you can compare “Color 01” and “Color 02” side by side on the screen.
- Similarly, if you open another new window, detach it, and display the “Color 03” layer, you can compare the three color schemes side by side on the screen.
This time, I have described some useful functions and methods that can be used to come up with color schemes.
Using the above methods, you can easily create and compare various color scheme ideas.
Remember to save the file you have worked on so far at the end.
In the next article, I will explain the steps to add one last touch to the grid design for easy reference when weaving.
Thank you for reading to the end!