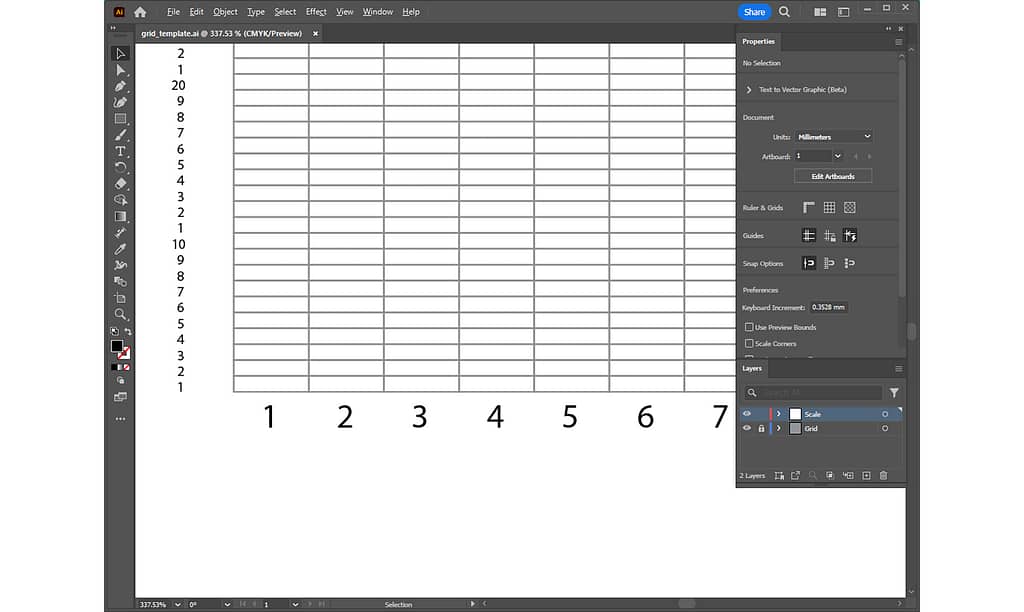
In creating a weaving design in Adobe Illustrator from now on, the first thing to do is to create a template with just a grid.
This may take some time at first, but as you become more familiar with Illustrator, you will be able to create it quickly.
The general procedure is as follows:
- Collect several past works and measure their sizes
- Calculate the aspect ratio of a rectangle that makes up the grid
- Create a rectangle in Illustrator
- Duplicate the rectangle horizontally to create the first grid row
- Fine-tune the first grid row
- Duplicate the first row of the grid upwards
- Set grid fill and line for ease of work
- Lock the grid layer
- Add scale to the grid
- Save the file
I would also like to introduce shortcut keys for working quickly.
1. Collect several past works and measure their sizes
To make the grid as accurately sized as possible, collect some of your previous work.
Note that you need to collect pieces woven with the same warp SETT. For an explanation of warp SETT, see the following article:
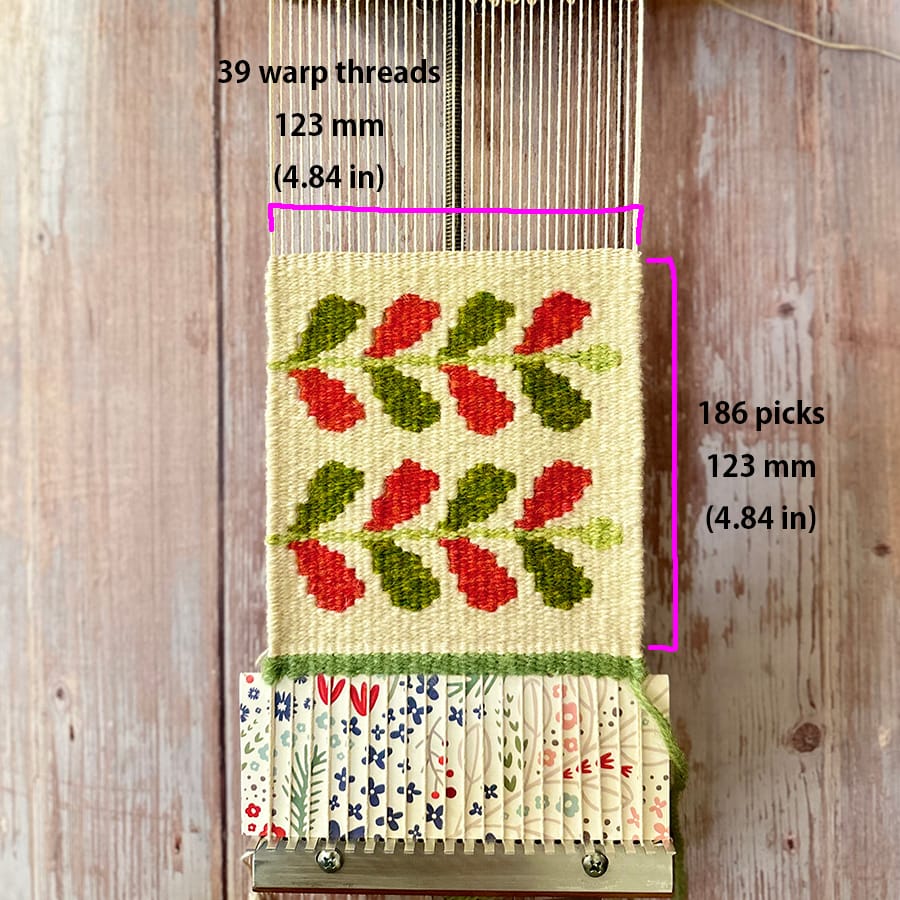
The photo shows a sample woven on 8 EPI warp SETT, consisting of 39 warp threads, woven on 186 weft picks. The length and width of the body alone, not including the top and bottom headers, were measured to be approximately 123 mm (4.84 inches) square.
If you are not sure how many weft picks the entire piece was woven with, visually count about 20 weft picks and measure the length of them.
2. Calculate the aspect ratio of a rectangle that makes up the grid
Formulas:
| Horizontal length of the rectangle: Horizontal length of the body of the work ÷ Number of warp threads |
| Vertical length of the rectangle: Vertical length of the body of the work ÷ Number of picks of weft |
Using the numbers identified in procedure 1 above, find the aspect ratio of a single rectangular cell that makes up the grid.
For convenience, millimeters will be used as the unit of measurement in this article.
Let’s apply the sample numbers to the formulas.
| Horizontal length of the rectangle = 123 mm ÷ 39 = approx. 3.15 mm Vertical length of the rectangle = 123 mm ÷ 186 = approx. 0.66 mm |
If you do not know the overall number of weft picks, visually count 20 picks, for example, if the length of 20 picks of weft is 14 mm, then calculate as follows:
| Vertical length of the rectangle = 14 mm ÷ 20 = approx. 0.7 mm |
In this way, the aspect ratio of the rectangular cells that make up the grid can be confirmed.
3. Create a rectangle in Illustrator
From this point on, let’s work in Illustrator to create a single rectangular cell using the numbers obtained in procedure 2 above.
Follow the steps below:
- See the previous article to create a blank document in Illustrator.
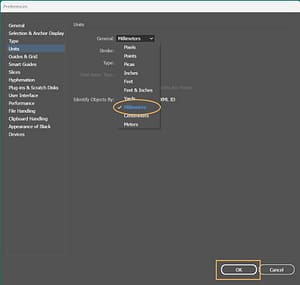
Adobe Illustrator for Weaving Grid Design - Go to Edit menu – Preferences – Units to set the General unit to Millimeters.
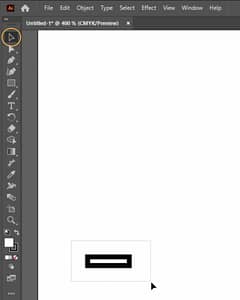
- The first rectangular cell will be created in the lower left corner of the artboard, so enlarge the screen to make it easier to work with.
- Select the Rectangle tool from the vertical toolbar on the left.
- With the Rectangle tool, drag on the artboard to create a small rectangle.
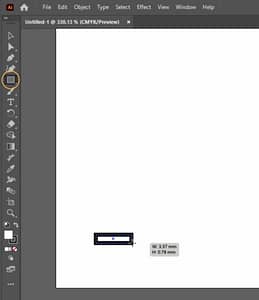
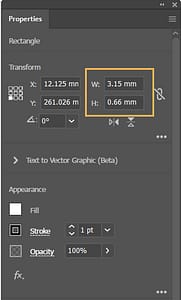
- With the rectangle selected, enter “3.15” in the “W” field and “0.66” in the “H” field in the Properties panel.
If the rectangle is deselected, select the Selection tool on the toolbar, select the rectangle to enclose it, and then enter the numerical values in the Properties.
4. Duplicate the rectangle horizontally to create the first grid row
Next, duplicate the first rectangular cell created in procedure 3 horizontally by the number of warp threads.
Follow the steps below:
- With the rectangle still selected, Go to Object menu and select Transform – Move in that order.
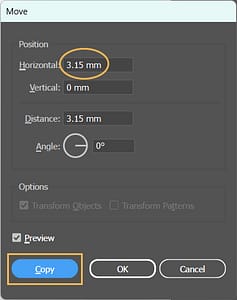
If the rectangle is deselected, select the Selection tool on the toolbar, select the rectangle to enclose it, and then select Object menu – Transform – Move. - In the Horizontal field of the Move dialog, enter 3.15 mm and click the Copy button. The rectangle is now duplicated to its right neighbor.
- You can repeat the same process for the remaining number of warp threads, but a faster way is to use Transform Again command.
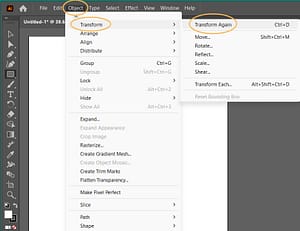
Click on Object menu – Transform and select Transform Again at the top.
There is also a shortcut key for the command. On Mac computers, press the Command key on the keyboard first, followed by the “D” key; on Windows, press the Ctrl key first, followed by the “D” key, to execute the Transform Again command.
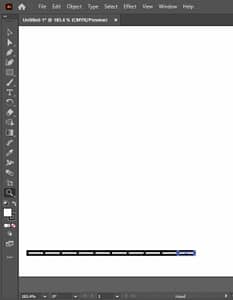
- In the sample, there are 39 warp threads, so I will duplicate them so that 39 rectangular cells line up horizontally.
5. Fine-tune the first grid row
The next task will vary depending on the size of the piece you design, but here is an explanation based on the settings used in the sample “8 EPI in SETT with 39 warp threads“.
There is a blank space on the right side of the first grid just created, so I want to expand it to use as much artboard space as possible.
The steps are as follows:
- Select the first grid row. If it is deselected, select the Selection tool on the toolbar and choose 39 rectangles to enclose.
Alternatively, there is a shortcut key. On Mac computers, press the Command key on the keyboard first, followed by the “A” key; on Windows, press the Ctrl key first, followed by the “A” key, to execute the Select All command.
- Then click on Object menu – Transform again, this time selecting Scale.
- Enter “150%” in the “Uniform” field and click OK.
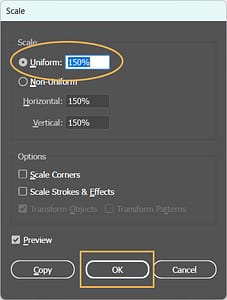
- If the grid extends outside of the artboard, drag it with the Selection tool and move it to fit inside the artboard.
- You will see that after 150% enlargement, the vertical length of the rectangle is now 0.99 mm in the Properties panel. Since the difference is very small, I would like to add 0.01 mm to make it “1 mm“.
With the entire area still selected, enter “1 mm” in the H field in the Properties panel.
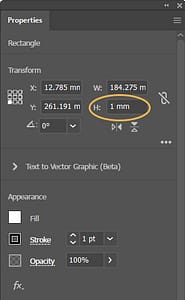
This completes the first row of the grid.
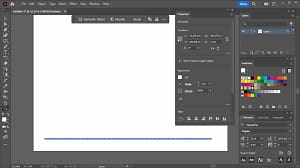
6. Duplicate the first row of the grid upwards
The next task is to duplicate the first grid row to upper side by the number of picks of the weft.
The steps are as follows:
- With the entire first grid selected, select Object menu – Transform – Move in this order.
- Enter “0 mm” for the Horizontal direction and “-1 mm” for the Vertical direction, then click the Copy button. A negative value will duplicate the object upwards.
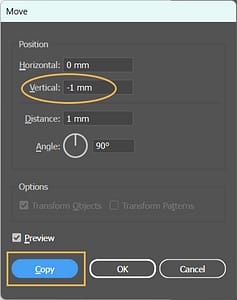
- Repeat the Transform Again command described in procedure 4 to duplicate for 10 rows.
- Once 10 rows have been duplicated, select the entire objects again and choose Object menu – Transform – Move in the order.
- Enter “0 mm” for the Horizontal direction and “-10 mm” for the Vertical direction, then click the Copy button.
20 rows are now duplicated.

- Repeat the Transform Again command to duplicate for 100 rows.
- When 100 rows have been duplicated, select the entire objects again and go to Object menu – Transform – Move in the order.
- Enter “0 mm” for the Horizontal direction and “-100 mm” for the Vertical direction, then click the Copy button.
Now, 200 rows have been duplicated.
In this way, duplicate the required number of rows.

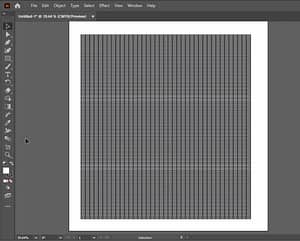
7. Set grid fill and line for ease of work
Let’s do a few more tasks to get the template ready. Here, let’s set up grid fill and line.
Follow the steps below:
- Select the whole rectangles, click on the color box next to “Fill” in the Properties panel, and select None. The color inside the rectangles will become transparent.
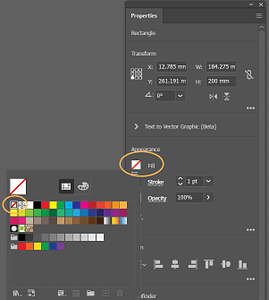
- Select the color box next to “Stroke” and choose the middle gray color. Further, set the line thickness to “0.25 pt“.
Clicking on an empty area of the artboard will deselect all rectangles and you can see the entire image.


In this way, the grid lines will be thin and light in color, so they will not interfere with the work you are designing.
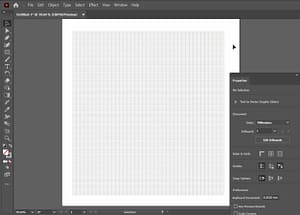
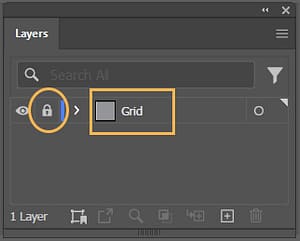
8. Lock the grid layer
I would like to lock the grid just created so that it will not move due to wrong operation. Here is how to lock it:
- Display the Layers panel. If it is not displayed, select Layers from the Window menu to display it.
- Double-click “Layer 1” to make the text editable. I would like to rename it “Grid” to make it easier to work with in the future.
- Next, click on the space between this layer and the eye icon to the left to reveal the lock icon. This will lock the layer.
9. Add scale to the grid
Let’s do one last task. I would like to add scales to the grid as follows:
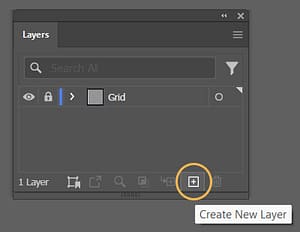
- To create scales on a new layer, click “Create New Layer” in the Layers panel to create a layer called “Layer 2“.
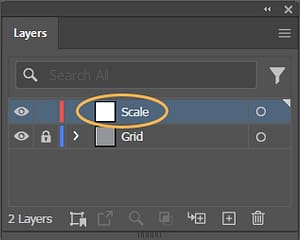
- Here, I would like to rename it to something easy to understand, such as “Scale“.
- Now, to make it easier to work with, zoom in on the screen to enlarge the bottom left-most rectangle of the grid.
- Select the Type tool.
- Click under the bottom left-most rectangle of the grid. Enter the number “1“. Select back to the Selection tool and set the font size in the Character panel. In this case, I will set it to “6 pt“.
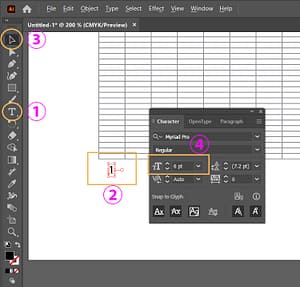
- Select Object menu – Transform – Move in this order.
- Enter “4.725 mm” for the Horizontal direction and “0 mm” for the Vertical direction, then click the Copy button. The number “1” is now copied under the adjacent rectangle as well.
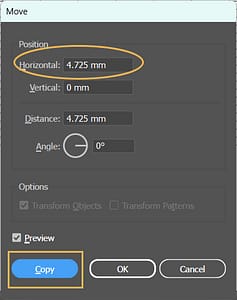
- Execute the Transform Again command to duplicate for 10 pieces.
- Once 10 numbers are made, the number “1” is in a line of 10, so retype the letters 2, 3, 4, …. After entering up to 10, select 1 through 10 and duplicate them horizontally to 47.25 mm.
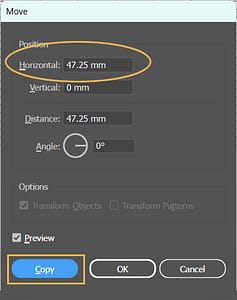
- Repeat the Transform Again command two more times, retype the numbers, and the horizontal scale is complete.
- Repeat the process for the vertical scale in the same way, using “-1 mm” for the vertical direction.
- The font size of the vertical scale is set to 2.5 pt here by entering “2.5” in the font size text field.

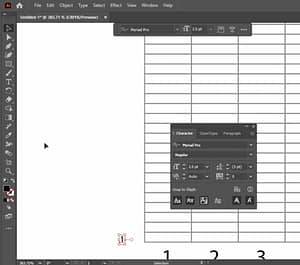
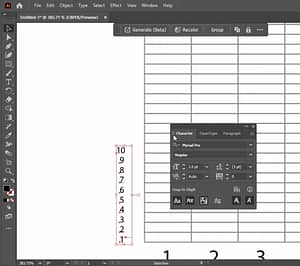
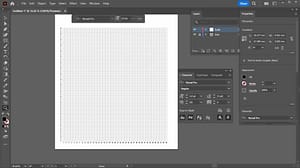
10. Save the file
Now that the grid template is complete. Thanks for your hard work!
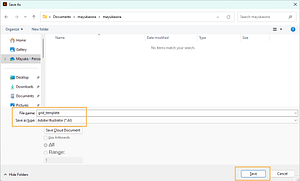
Let’s save the file.
- Go to File menu and select Save.
- The file format should be saved as “.AI” in Adobe Illustrator format.
The series of steps in the above procedure #3 to #10 can be viewed in the YouTube video. Although some detailed work is involved, I hope it will be helpful.
Note that different warp SETT (EPI) and weft thicknesses will result in different aspect ratios of the rectangular cells that make up the grid.
I recommend you measure and create a template based on the tapestry pieces you usually create frequently.
Thank you for reading to the end!