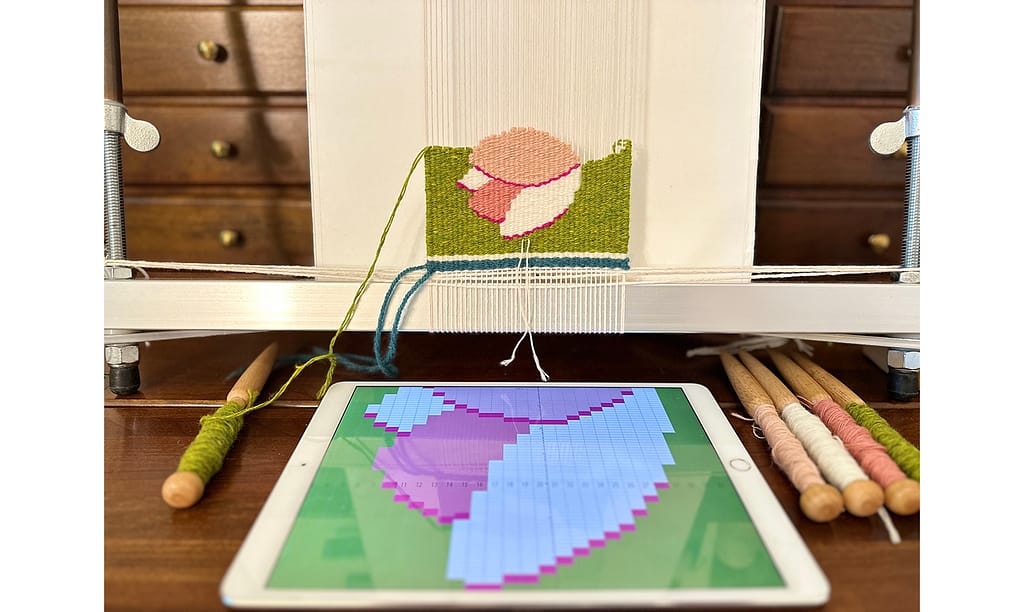
In the past seven articles, I have shared information on how to create a grid design using Adobe Illustrator.
In this article, as the final step, I will show you how to convert the grid design you have created on your computer to a versatile PDF file so that it can be viewed on other devices such as tablets that do not have Illustrator installed.
In doing so, I would like to add a little twist before converting the design to a PDF file.
For previous articles, please refer to the following links:
- [1] For basic information and basic operations of Illustrator, Adobe Illustrator for Weaving Grid Design
- [2] For information on how to create a grid template, Creating a Grid Template in Adobe Illustrator
- [3] For information on how to import a rough sketch, Placing a Rough Sketch in Adobe Illustrator
- [4] For information on how to create a rough grid design, Coloring on the Grid in Adobe Illustrator
- [5] For information on how to adjust the grid design, Adjust Grid Design for Easy Weaving (Work in Adobe Illustrator)
- [6] For information on how to register colors close to the weft, Matching Weft Colors for Grid Design in Adobe Illustrator
- [7] For information on useful features for making color schemes of grid designs, Considering Color Schemes in Grid Design Using Layers
In this article, I will explain the following items. Let’s make the grid easier to read for weaving.
1. Save the grid design file as a different name
First, save the grid design file you have been working on in Illustrator under a different name.
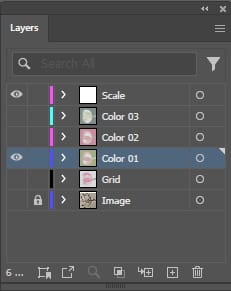
- Open the grid design file in Illustrator, and in the Layers panel, display the scale layer and the layer with the color scheme you like best.
In the sample, the “Scale” layer and the “Color 01” layer are displayed. If these layers are locked, unlock them. Hide the other layers.
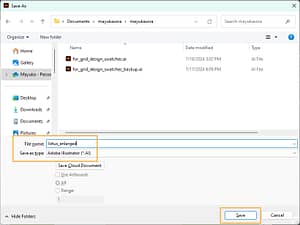
- Select Save As from the File menu.
- Add some name to the file name and save it.
In the sample, I named the file “lotus_enlarged”.
2. Scale the grid vertically before converting to PDF
As you may have noticed, the grid design we have created so far consists of very horizontal rectangles.
For this reason, I always enlarge the grid vertically and save it. The procedure is as follows:
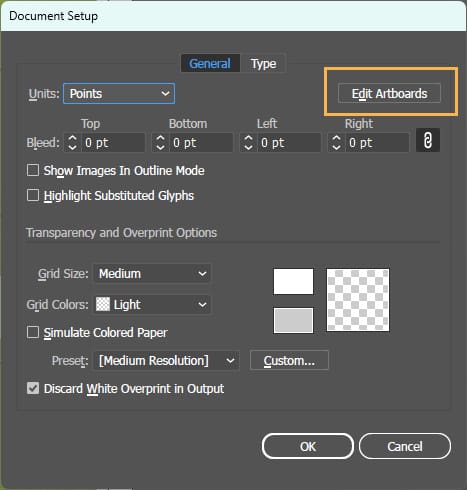
- With the file you just saved as open, open the File menu again, this time selecting Document Setup.
- The following window will appear. Click on the Edit Artboards button.
- A blue dotted line will appear on the artboard border. Drag the white square on the bottom edge downward to extend the artboard.
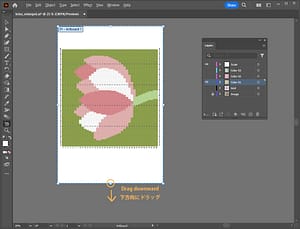
- Switch to the Selection tool and the blue dotted line will disappear and the extended artboard will be finalized.
- Scale down the screen so that the entire artboard is visible.
- Select All from the Select menu.
Or use the shortcut keys: Command + A for Mac, Ctrl + A for Windows. - Click on Object Menu – Transform and select Scale.
- In the Non-Uniform – Vertical field, type “150%” and click OK.
The grid design will be vertically expanded, but this will make the grid easier to see when weaving.
If necessary, it can be expanded as much more as desired, such as 160% or 170% instead of 150%.

- If the grid objects extend beyond the top of the artboard, hold down the Shift key and tap the down arrow key on the keyboard about 10 times while keeping all the objects selected.
This will move the object downward about 3.5 cm (1.5 in).
If all objects are moved inside the artboard, you are good to go.
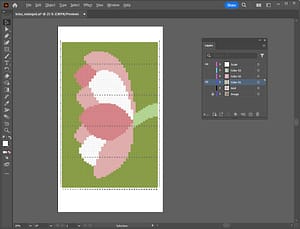
- Now save the file once. Select Save from the File menu.
- Next, as an option, if you want to add more scales, you can copy the existing scales and place them in several places.
In the sample, the vertical scale on the left side is placed on the right side as well, and four horizontal scales are added in the upward direction.
To copy, use Transform – Move from the Object menu. - After adding the scales, select Save from the File menu again.
In the following images, you can compare the readability before and after enlargement. After vertically enlarging the image, each rectangle should be easier to see.
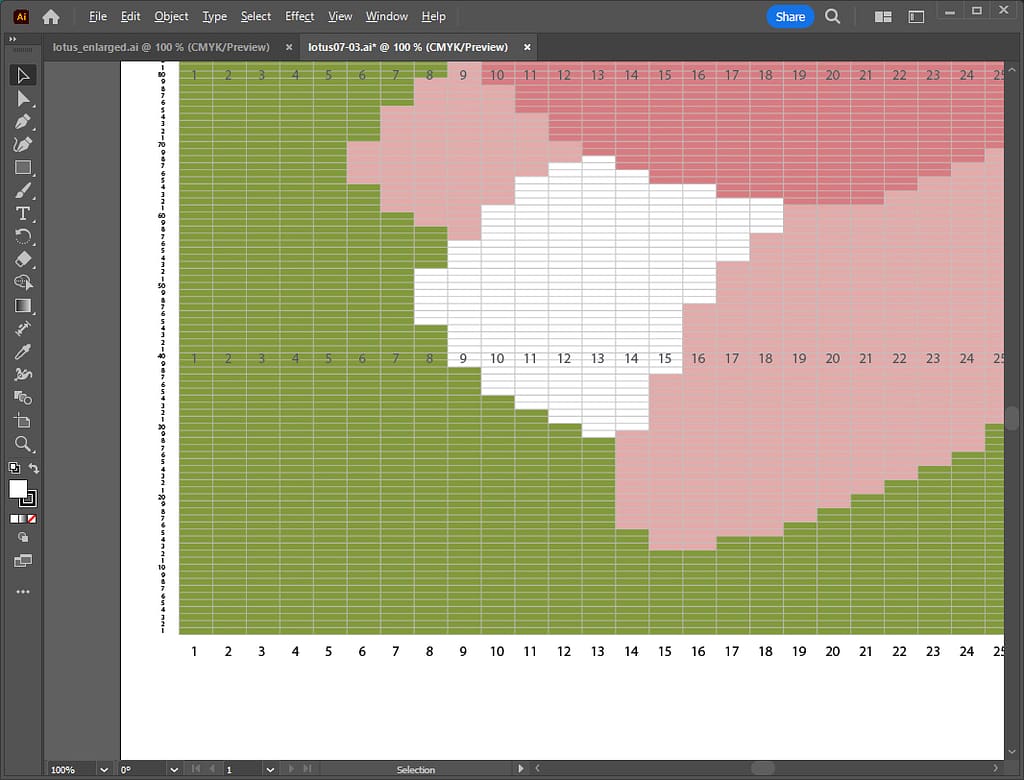
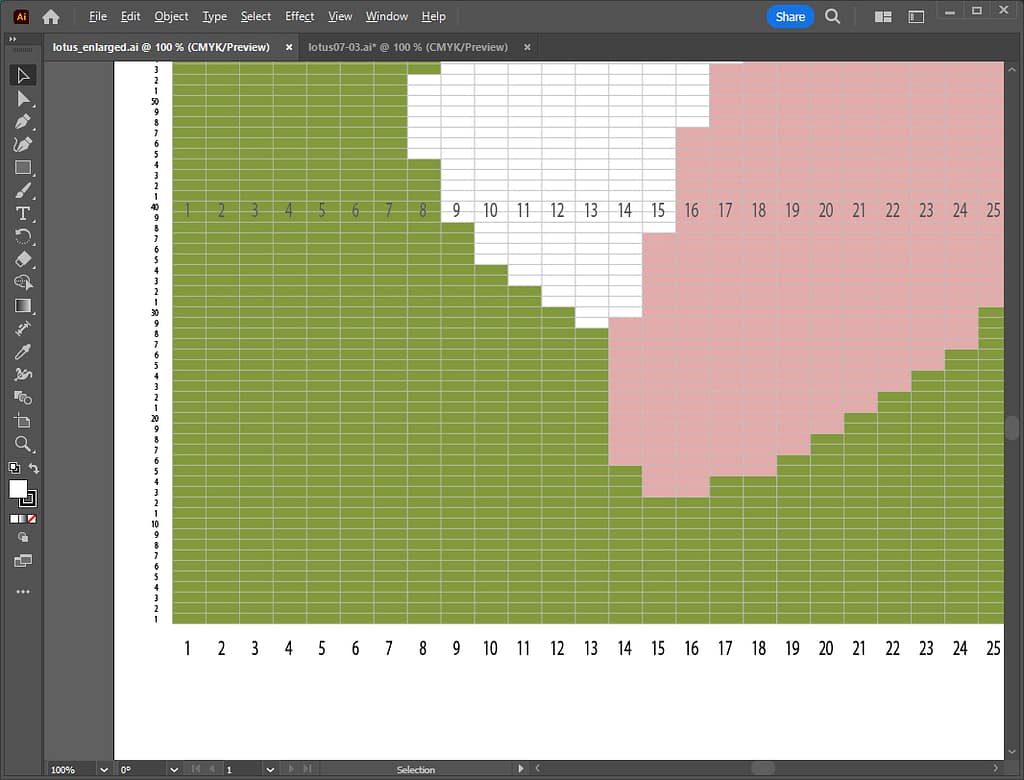
3. Save as PDF format
Now, let’s save the file in PDF file format.
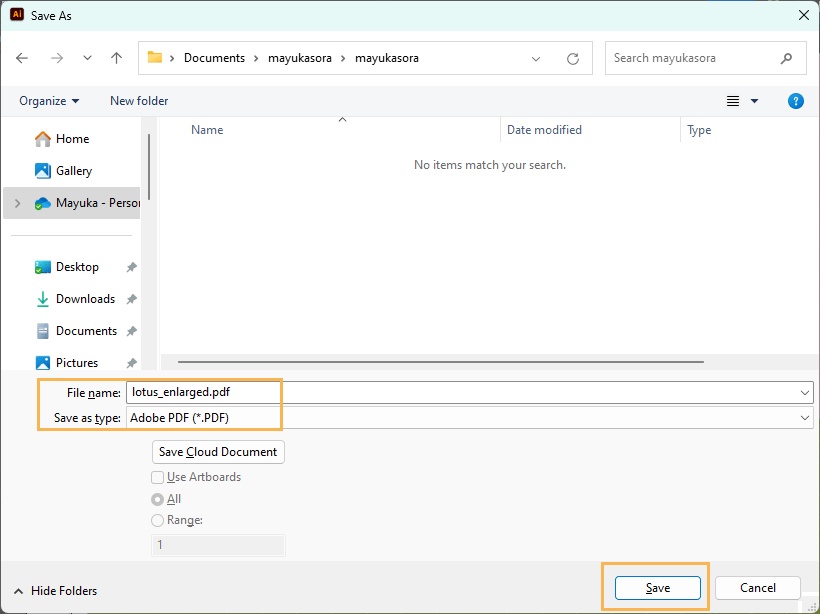
- Open the File menu and select Save As.
- Select “Adobe PDF” as the file format. You can leave the file name as it is.
Select a location that is easy to find, such as the document folder or the desktop, for the save location.
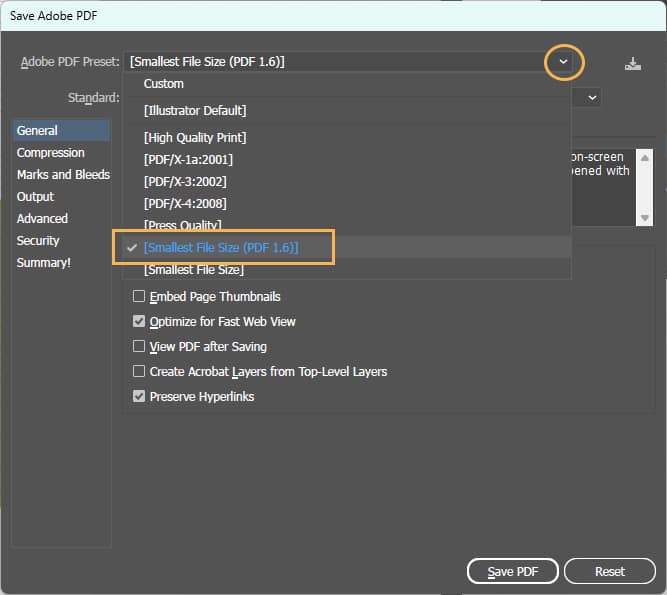
- The following window will appear. Select “Smallest File Size (PDF 1.6)” from the Adobe PDF Preset pull-down and click the Save PDF button.
- The following message will appear asking if you wish to preserve Illustrator editing capabilities. Since the file size will be smaller if you do not preserve them, click OK and save the file as is.
In the future, if you want to edit the file, you can do so using the file saved in Illustrator format. Here, I would like to prioritize reducing file size for PDF files.

- Open the saved PDF file with your PDF viewing software; Adobe’s Acrobat Reader is available for free download.
- If it opens without any problems, your PDF creation is complete.
The link to the Acrobat Reader download site is below. Clicking on the link will take you to Adobe’s page.
4. Open and review on other devices
Check to see if you can open the PDF file you created on another device.
An easy way to do this is to send a PDF attachment to an email to yourself and open the attachment on the device that will receive the email.
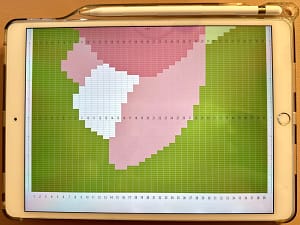
For example, you could receive the email on your iPad and simply open the PDF attached to the email.
Then, when weaving, you can place your iPad in front of your loom and weave while zooming in and out on the screen.
If you want to print the grid design on paper, the vertical expansion may not fit on a single sheet of paper. In that case, please print on two separate sheets of paper.
If you want to save color ink in your printer, you can also print in black and white;)
Grid design completed!
That is all for now, including this article, the procedures for creating a grid design using Adobe Illustrator have been explained in eight parts.
In total, five files were created as follows:
- A grid template file: File format is Illustrator format (.ai)
*When you want to create a new design, you can start with this template. - A grid design file made with actual aspect ratio: File format is Illustrator format (.ai)
*Use this file to edit the design when you need to modify it. - A grid design file expanded vertically for easy reference when weaving: File format is Illustrator format (.ai)
- A file in PDF format (.pdf) so that the above vertically expanded file can be opened on other devices.
- A swatch library file: File format is Illustrator format (.ai)
*If you want to modify the colors, use this file to edit them. After editing, open the file as a swatch library of grid design files.

In addition to these files, several backups were also saved. Once these five files have been created, the grid design creation is complete!
I hope all the information in the series will be helpful for your weaving projects.
There are other useful functions in Illustrator, which I would like to introduce in the near future.
Thank you for reading to the end!
