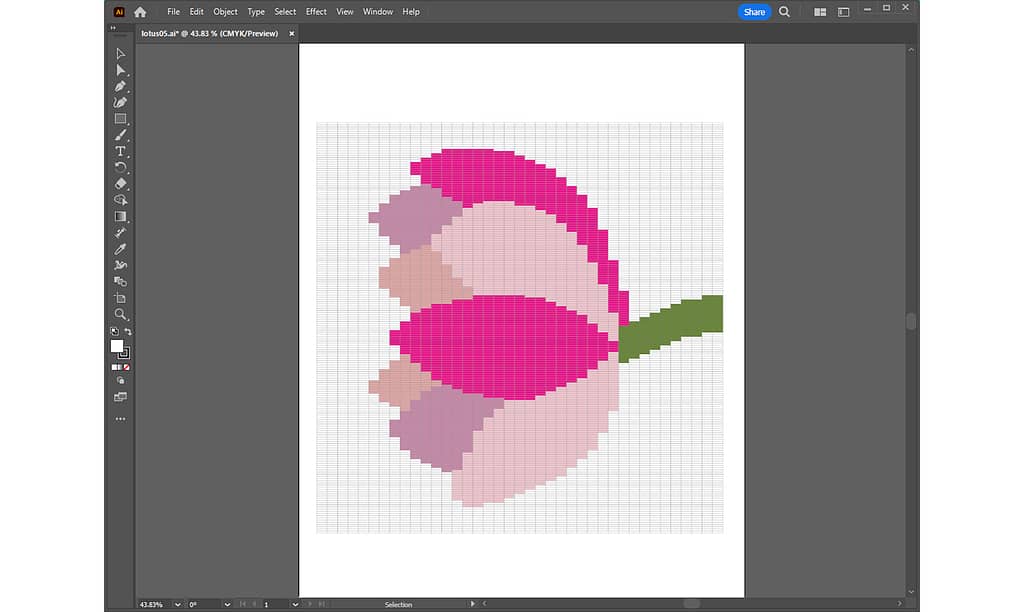
When actually weaving, we want to connect the weft threads as much as possible. It would be easier to do less tailings.
This time, let’s adjust the rough design made last time in Adobe Illustrator to make it easier to weave.
For previous articles, please refer to the following links:
- [1] For basic information and basic operations of Illustrator, Adobe Illustrator for Weaving Grid Design
- [2] For information on how to create a grid template, Creating a Grid Template in Adobe Illustrator
- [3] For information on how to import a rough sketch, Placing a Rough Sketch in Adobe Illustrator
- [4] For information on how to create a rough grid design, Coloring on the Grid in Adobe Illustrator
This article will discuss the following items:
実際に織るときに、ヨコ糸をできるだけつなげて織りたいものです。テール処理をする回数が少ない方が楽だと思います。
今回は、前回作ったラフなデザインを Adobe Illustrator を使って調整して、織りやすいデザインにしましょう。
前回までの記事は、以下のリンクから参照してください。
- [1] Illustrator の基本情報・基本操作については、手織りグリッドデザインのためのアドビ イラストレーター
- [2] グリッドテンプレートの作り方については、アドビ イラストレーターで作るグリッドテンプレート
- [3] 下絵を取り込む方法については、アドビ イラストレーターに下絵を取り込む
- [4] ラフなグリッドデザインを作る方法については、アドビ イラストレーターでグリッドに色を塗る
今回の記事では、以下の項目について説明していきます。
1. Explanation of weaving technique “Meet and Separate” | 織り方の技法「ミート&セパレート」の説明
In my previous article, “Mastering Plain and Tapestry Weaving with a Sample“, I introduced the “Meet and Separate” weaving technique.
The meet-and-separate technique is a weaving method in which the weft threads meet and separate at the border of the pattern. The points where the weft threads fold over are always next to each other at the border of the pattern.
This technique prevents the weavings from becoming misaligned and revealing warp threads.
Now, let’s point out the places that are not meet and separate in the rough design grid created last time.
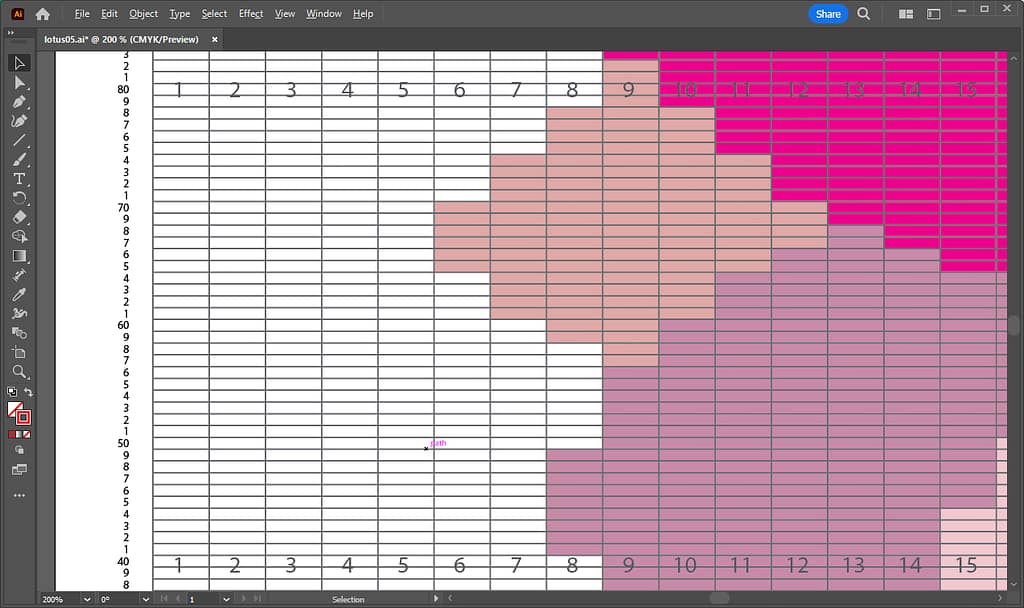
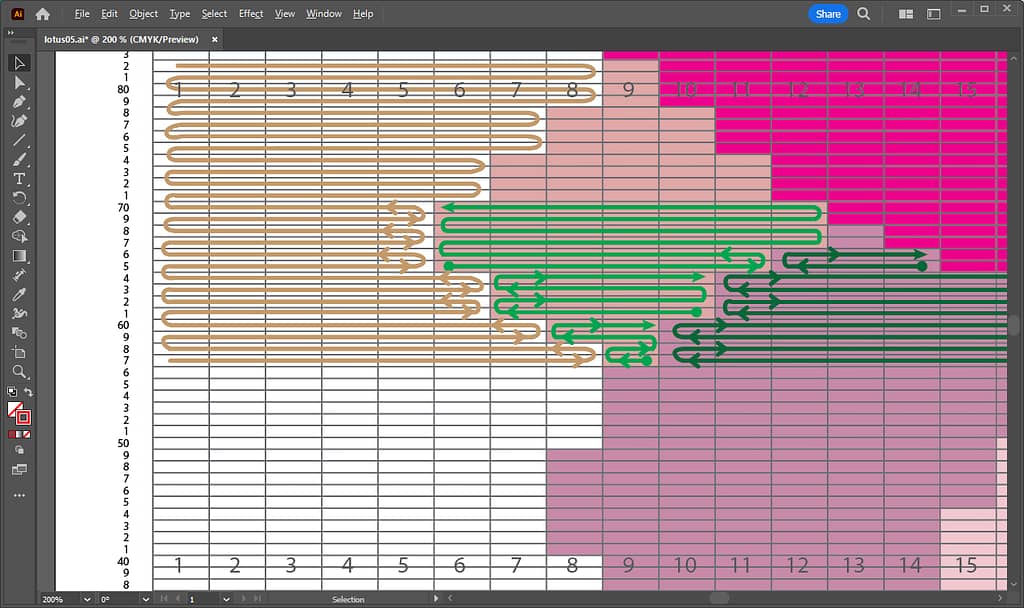
In Figure 1, I zoomed in on some of the petals. In Figure 2, I have drawn arrows on the pathways where the weft threads will travel.
以前書いた記事「サンプルを使って平織りとタペストリー織りをマスターする」で、「ミート&セパレート」という織り方の技法について紹介しました。
ミート&セパレート技法は、模様の境目で、ヨコ糸が出会って分かれていく織り方です。ヨコ糸の折り返し地点が、模様の境目で常に隣り合わせになります。
この技法により、織り目の位置がずれて、ワープが見えてしまう現象を防ぎます。
では、前回作ったラフなデザイングリッドで、ミート&セパレートになっていない箇所を指摘してみましょう。
図1で、花びらの一部をズームインしました。図2では、ヨコ糸が通る道順に矢印を描きました。
In the figure below, I put “O” marks for places that follow Meet and Separate and “X” marks for places that do not.
下図では、ミート&セパレートに従っている部分は「〇」、従っていない部分は「X」をつけました。
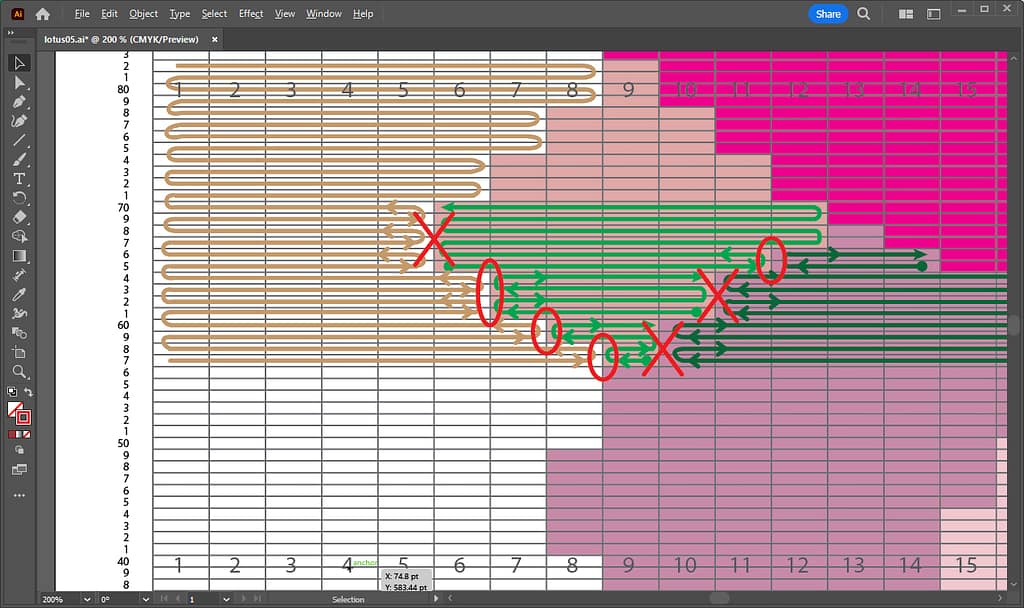
X: Not Meet and Separate (Heading in the same direction) | ミート&セパレートではない(同じ方向に向かっている)
Now let’s adjust the pathways of the weft threads in the next section.
では、このヨコ糸の通り道を、次のセクションで調整していきましょう。
2. Adjusting the design while simulating the path of the weft threads | ヨコ糸の通り道をシミュレーションしながらデザインを調整
The smallest petal described in the section above has been slightly edited in Illustrator as shown in the figure below.
The red frames are the rectangles the color was changed to the adjacent petal color, and the blue frames are the rectangles where the color was added.
上のセクションで説明した小さな花びらを、Illustrator で以下の図のように少しだけ編集しました。
赤い枠が、隣の花びらの色に変更した部分で、青い枠が、色を足した部分です。

Blue frames are the rectangles where the color was added | 青い枠は、色を足した長方形
With this slight edit, the weft pathways now follow meet and separate, as shown in the figure below.
この少しの編集で、下図のように、ヨコ糸の通り道が、ミート&セパレートに沿うようになりました。

There are two points to check in this adjustment process:
As shown in the figure below, a weft fold point occurs at the border of the pattern for each petal. Notice that the places with the orange vertical lines have an even number of rows.
Another point to check is that the left and right folded rows of a pattern are not the same. For example, as indicated by the orange curve and arrow, the last folded over row on the right side is one row before the last fold on the left side.
Making adjustments at the two points above will result in a grid design that allows the weft to be woven as long as possible.
However, it is also important to make adjustments so as not to significantly disrupt the design.
For example, as the pattern becomes more complex, the number of weft colors used in a single row increases, and it may not be possible to fold over an even number of rows.
The places with blue vertical lines have an odd number of rows. In such cases, that is where the tailing of the weft should be performed.
When a long weft pathway does not continue well, I would give up and use tail processing when weaving.
Alternatively, take the method described in the following article to move the weft once to the back side of the warp.
この調整の作業でチェックするポイントは、2つです。
下の図にあるように、花びら一枚一枚の模様の境目で、ヨコ糸の折り返し地点が発生します。オレンジの縦線をつけた部分が偶数段となっている点に注目してください。
もう一つのチェックポイントは、一つの模様の左右の折り返しの段は同じ段ではないということです。たとえば、オレンジの曲線と矢印で示したように、右側で最後の折り返しをした段は、左側では、折り返しの一つ前の段となっています。
上記の2つのポイントで調整をしていくと、ヨコ糸をできるだけながくつなげて織ることができるグリッドデザインとなります。
ただし、デザインを大きくくずさないように調整をすることも大事です。
例えば、パターンが複雑になっていくと、一つの段で使われるヨコ糸の色も増えていき、偶数段で折り返せない場合があります。
青い縦線をつけた部分は奇数段となっています。その場合は、そこが、ヨコ糸のテール処理を行う場所となります。
ヨコ糸がうまく長くつながらないときには、あきらめて、織るときにテール処理で対処します。
または、以下の記事で紹介した方法で、一度ワープの裏側に退避させる方法をとります。

3. Zoom in and out of the screen to see the overall balance | 画面を拡大・縮小し、全体のバランスを見る
Once the weft pathways are simulated and the design is adjusted, look at the overall balance.
Zoom out the artboard in Illustrator and check for any lines of concern.
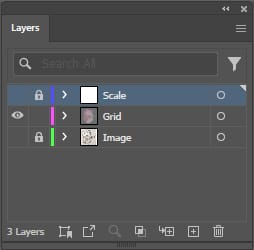
- It is easier to check the whole design if only the grid layer is displayed, so hide all but the grid layer.
In the Layers panel, click the eye icon to the left of the Scale layer and the Image layer to hide the layers.
ヨコ糸の通り道をシミュレーションしてデザインの調整が終わったら、全体のバランスを見ていきます。
Illustrator でアートボードをズームアウト(縮小)して、気になるラインがないかチェックしましょう。
- グリッドレイヤーだけ表示した方が全体をチェックしやすいので、グリッドレイヤー以外は、非表示にしましょう。
レイヤーパネルで目盛レイヤーとイメージレイヤーの左横にある目のアイコンをクリックして、レイヤーを非表示にします。
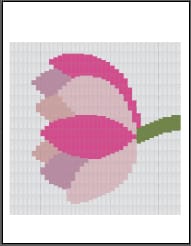
- With the Zoom tool, zoom out on the artboard so that the entire design is visible.
By zooming out quite small, as shown in the figures below, it will be easier to get a sense of the overall atmosphere.
Before adjustment is on the left and after adjustment is on the right. Each zooms out to 12.5%.
- ズームツールで、アートボードをズームアウトして、デザインの全体が見える状態にします。
下図のように、かなり小さくズームアウトすることで、全体の雰囲気がつかみやすくなると思います。
調整前が左の図で、調整後が右の図です。それぞれ12.5%にズームアウトしています。

- If there are any lines that bother you, repeat corrections and adjustments to complete the grid design.
- 気になるラインがあったら、修正と調整をくりかえして、グリッドデザインを完成させます。
4. Save the file | ファイルを保存する
Once here, choose Save from the File menu to overwrite the file.
Just to be safe, I would like to save the backup file.
Again, open the File menu, this time selecting Save As, and save the file under a different name, such as “Backup“.
いったんここで、ファイルメニューから保存を選択し、ファイルを上書き保存しましょう。
念のため、バックアップファイルも保存したいと思います。
再度、ファイルメニューを開き、今度は、別名で保存を選択し、「バックアップ」など、名前を変えて保存します。
In this article, we made design adjustments considering the pathways of the weft. After all this work, we are almost done.
In the next article, I would like to show you how to adjust the colors.
Thank you for reading to the end!
今回は、ヨコ糸の通り道を考えたデザイン調整を行いました。ここまでの作業が終わったら、あともう少しです。
次の記事では、色の調整方法について紹介したいと思います。
最後まで読んでいただき、ありがとうございます。