The work so far may have been all about details: creating and adjusting the grid design, registering colors as close as possible to the color of the weft, and so on.
This time around, I will explain the process of coming up with a color scheme for a grid design. It is not as detailed as previous tasks. I believe the work will make us realize how wonderful the software is.
For previous articles, please refer to the following links:
- [1] For basic information and basic operations of Illustrator, Adobe Illustrator for Weaving Grid Design
- [2] For information on how to create a grid template, Creating a Grid Template in Adobe Illustrator
- [3] For information on how to import a rough sketch, Placing a Rough Sketch in Adobe Illustrator
- [4] For information on how to create a rough grid design, Coloring on the Grid in Adobe Illustrator
- [5] For information on how to adjust the grid design, Adjust Grid Design for Easy Weaving (Work in Adobe Illustrator)
- [6] For information on how to register colors close to the weft, Matching Weft Colors for Grid Design in Adobe Illustrator
In this article, the following items will be explained to complete the grid design.
これまでの作業は、グリッドデザインの作成と調整、ヨコ糸の色にできるだけ近い色の登録、など、細かい作業ばかりだったかもしれません。
今回は、グリッドデザインの配色を考える作業になります。いままでの作業と比べたら、もうそれほど細かい作業ではなく、ソフトウェアのすばらしさを実感する作業となると思います。
前回までの記事は、以下のリンクから参照してください。
- [1] Illustrator の基本情報・基本操作については、手織りグリッドデザインのためのアドビ イラストレーター
- [2] グリッドテンプレートの作り方については、アドビ イラストレーターで作るグリッドテンプレート
- [3] 下絵を取り込む方法については、アドビ イラストレーターに下絵を取り込む
- [4] ラフなグリッドデザインを作る方法については、アドビ イラストレーターでグリッドに色を塗る
- [5] グリッドデザインの調整方法については、織りやすいようにグリッドデザインを調整(アドビ イラストレーターでの作業)
- [6] ヨコ糸に近い色を登録する方法については、アドビ イラストレーターでグリッドデザインのためのヨコ糸色合わせ
今回の記事では、以下の項目を説明し、グリッドデザインを完成させていきます。
1. Master the use of layers | レイヤーの使い方をマスターする
In previous articles, I have explained several times the following functions of the Layers panel:
- Create New Layer
- Lock layers
- Show and hide layers
これまでの記事で、レイヤーパネルの以下の機能について、何度か触れてきました。
- 新規レイヤーを作成
- レイヤーのロック
- レイヤーの表示・非表示
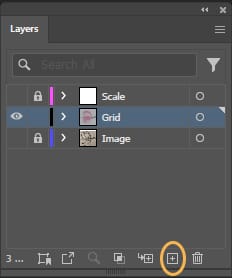
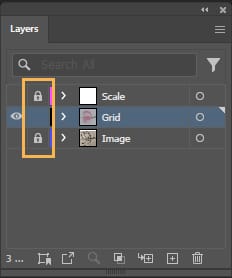
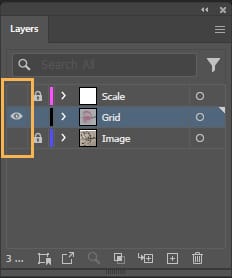
In addition to the above functions, here is another way to use layers that you should know in order to come up with an efficient design. The steps are as follows:
- Select Open from the File menu and open your grid design file.
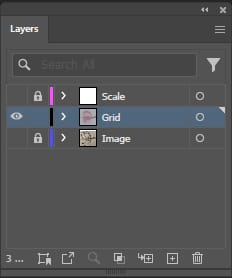
- In the Layers panel, hide and lock all layers except the Grid layer. Only the Grid layer will be visible and ready for editing.
上記の機能の他に、レイヤーを使って効率的にデザインを考えるために、知っておくとよい使い方を紹介します。ステップは、以下です。
- ファイルメニューから開くを選択し、グリッドデザインのファイルを開きます。
- レイヤーパネルで、グリッド以外のレイヤーを非表示にし、ロックします。グリッドレイヤーのみが表示され、編集できる状態です。
- Select the Grid layer and click Create New Layer. An empty layer will be created above the grid layer.
In this example, I will name the new layer “Color 01“.
- グリッドレイヤーを選択し、新規レイヤーを作成をクリックします。グリッドレイヤーの上に空のレイヤーが作成されます。
ここでは、新規レイヤーの名前を「Color 01」とします。

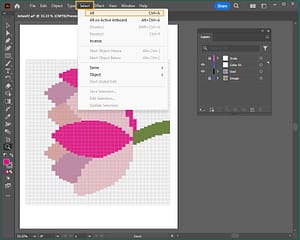
- Select All from the Select menu.
Or use the shortcut keys Command + A for Mac or Ctrl + A for Windows.
- 選択メニューからすべてを選択を選択します。
または、ショートカットキーで、Mac の場合は、コマンド+A、Windows の場合は、Ctrl+A を使います。
- Select Copy from the Edit menu.
Or use the shortcut keys Command + C for Mac or Ctrl + C for Windows.
- 編集メニューからコピーを選択します。
または、ショートカットキーで、Mac の場合は、コマンド+C、Windows の場合は、Ctrl+C を使います。

- Select the “Color 01” layer in the Layers panel, then select Paste in Place from the Edit menu.
- レイヤーパネルで「Color 01」レイヤーを選択してから、続けて、編集メニューで同じ位置にペーストを選択します。
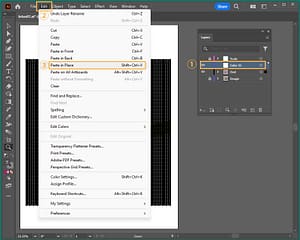
- The same objects as the grid layer are now pasted to the “Color 01” layer.
- 「Color 01」レイヤーにグリッドレイヤーと同じオブジェクトがペーストされました。
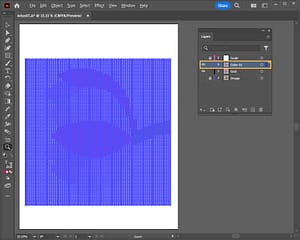
- When the grid layer is hidden and only the “Color 01” layer is displayed, you will see the same objects as the grid layer are pasted in the same position.
- グリッドレイヤーを非表示にし、「Color 01」レイヤーのみ表示してみると、グリッドレイヤーと同じオブジェクトが同じ位置にペーストされていることがわかります。
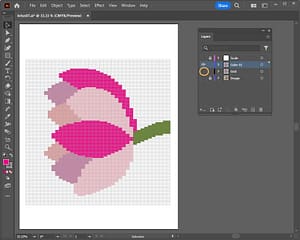
In the next section, let’s work on the color scheme in the “Color 01” layer.
次のセクションでは、「Color 01」レイヤーで配色の作業を行っていきます。
2. Efficiently change the color scheme of a grid design | グリッドデザインの配色を効率よく変更する
Now, open the swatch library that you registered in the previous article “Making Weft Colors for Grid Design in Adobe Illustrator” and use the registered weft colors to work on the color scheme.
- Select Open Swatch Library > Other Library from the menu in the upper right corner of the Swatches panel.
- Select and open the swatch library file we saved to open the swatch library panel.
では、前回の記事「アドビ イラストレーターでグリッドデザインのためのヨコ糸の色を作る」で登録したスウォッチライブラリを開いて、登録したヨコ糸の色を使って、配色の作業を行っていきましょう。
- スウォッチパネルの右上のメニューから、スウォッチライブラリを開く > その他のライブラリ を選択します。
- 前回保存したスウォッチライブラリファイルを選択して、スウォッチライブラリのパネルを開きます。
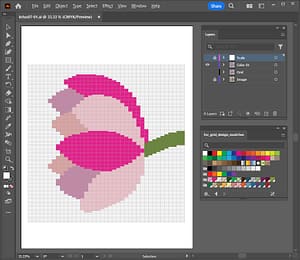
Let’s work on the color scheme using the colors in the swatch library. The figure on the left is before the change. From now on, the color scheme will be as shown in the figure on the right.
スウォッチライブラリの色を使って、配色の作業を行っていきます。左の図が変更前です。これより、右の図のような配色にしていきます。

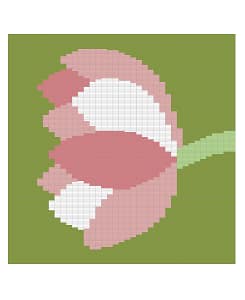
2-1. Select all objects of the same color at once and change the color | 同色のオブジェクトをいっぺんに選択して色を変更
First, I will change the background color to yellowish green and the stem color to light green. I will use the method of selecting the rectangles of each part at once.
Steps are listed below the video.
まずは、背景の色を黄緑にし、茎の色を薄い緑にしていきます。それぞれのパーツの長方形をいっぺんに選択する方法を使います。
動画の下にステップを記載します。
- In the “Color 01” layer, select some background rectangles.
- Go to the Select menu – Same – Fill Color.
- Only the background rectangles are selected. Double-clicking the yellow-green from the swatch library applied the color to the background.
- Similarly, change the stem green to light green. Follow the same step to select any of the stem rectangles.
- Go to the Select menu – Same – Fill Color.
- Select light green in the swatch library and apply the color.
In this way, you can select several rectangles at once and change their colors.
- 「Color 01」レイヤーで、背景の長方形をいくつか選択します。
- 選択メニューの共通を選択し、カラー(塗り)を選択します。
- 背景の長方形のみ選択されました。スウォッチライブラリから黄緑をダブルクリックすると、背景に色が適用されました。
- 同様に、茎の緑を薄い緑に変更します。同じステップで、茎の長方形をどれか一つ選択します。
- 選択メニューの共通を選択し、カラー(塗り)を選択します。
- スウォッチライブラリで薄緑を選択し、色を適用します。
このように、複数の長方形をいっぺんに選択して色を変更することができます。
2-2. Advanced object selection | オブジェクト選択の上級編
The next steps are to change the color of each petal. Selecting petals of the same color and locking objects around them makes it easier to select individual petals.
Steps are listed below the video.
次は、それぞれの花びらの色を変更していきます。同色の花びらを選択して、その周りのオブジェクトをロックすることで、個別の花びらが選択しやすくなります。
動画の下にステップを記載します。
- Select any of the top petal rectangles and go to the Select menu – Same – Fill Color.
- Open the Select menu again, this time choose Inverse.
- Now all but the dark pink petals are selected.
- Open the Object menu and choose Lock – Selection.
- Now all objects except the dark pink petals are locked, making it easier to select the dark pink petals.
- First, select the lower side dark pink petal. Drag with the Selection tool to select a portion, then hold down the Shift key on the keyboard to select the rest.
The Shift key can be used to select another object while also preserving the current selection. - Then select the pink from the swatch library and apply the color.
- Similarly, select the other dark pink petal on the upper side several times using the Shift key and select light pink from the swatch library.
- After these two petal color changes are done, unlock the object lock. Open the Object menu and select Unlock All.
The remaining petals will be recolored in the same steps.
The color scheme for Color 01 is completed as shown in the figure below.
- 一番上の花びらの長方形をどれか一つ選択し、選択メニューの共通/カラー(塗り)を選択します。
- もう一度、選択メニューを開き、今度は、選択範囲を反転を選択します。
- そうすると、濃いピンクの花びら以外が選択されました。
- オブジェクトメニューを開き、ロック/選択を選択します。
- そうすると、濃いピンク以外のオブジェクトがすべてロックされ、濃いピンクの花びらが選択しやすくなりました。
- 最初に、下の濃いピンクの花びらを選択します。選択ツールでドラッグして、一部を選択し、次に、キーボードの Shift キーを押しながら、残りの部分を選択します。
Shift キーを使うと、現在の選択も保持しながら、別のオブジェクトも選択することができます。 - そして、スウォッチライブラリからピンクを選択して、色を適用します。
- 同様に、上側にある濃いピンクの花びらも Shift キーを使いながら、何回かに分けて選択し、スウォッチライブラリから薄いピンクを選択します。
- この二つの花びらの色の変更が終わったら、オブジェクトロックを解除します。オブジェクトメニューを開き、すべてをロック解除を選択します。
残りの花びらも同じステップで色を変更していきます。
以下の図のように、Color 01 の配色が完成しました。

3. Consider multiple color schemes and compare them in layers | 複数の配色を考えて、レイヤーで比較する
Once the first color scheme is created, it is fun to repeat the same steps to come up with another color scheme.
In the steps described in Procedure 1, create a layer for another color scheme, and in the steps described in Procedure 2, change the colors all at once.
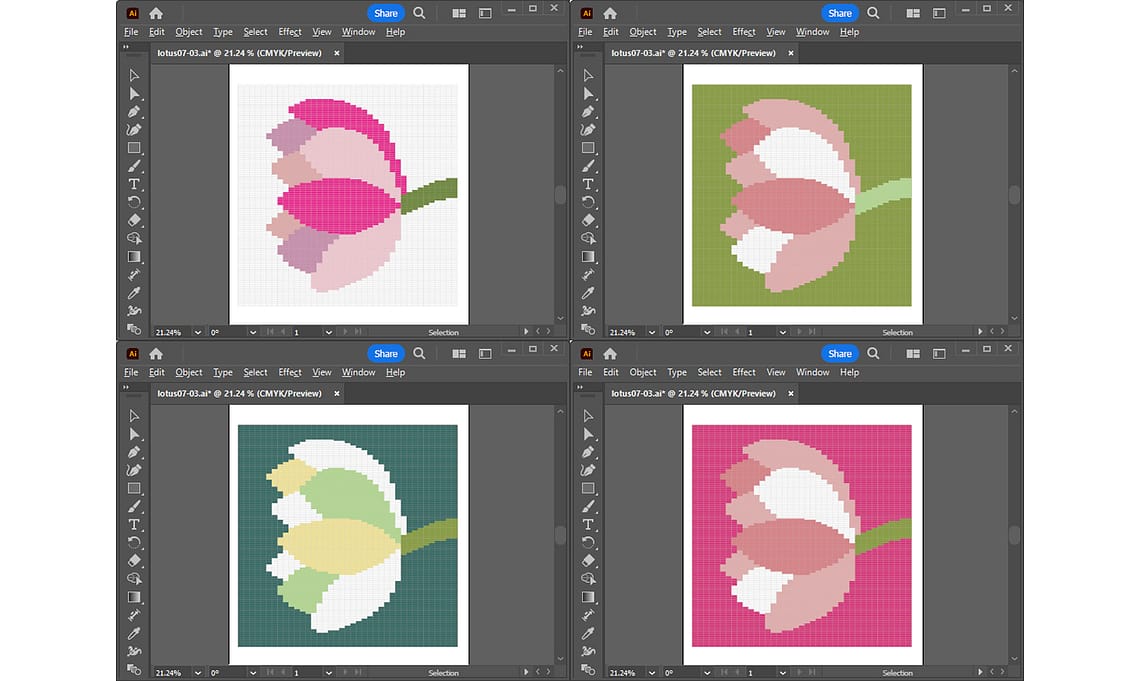
In the sample, I added two more color schemes.
You can also show or hide each layer in the Layers panel to compare the color schemes.
Watch the video below to see the steps.
一つ目の配色が出来上がったら、同じ手順を繰り返して、他の配色を考えるのも楽しいものです。
手順1で説明したステップで、別の配色のためのレイヤーを作り、手順2で説明したステップで、色をいっぺんに変更していきます。
サンプルでは、あと二つ配色を追加してみました。
レイヤーパネルで各レイヤーを表示または非表示にして、それぞれの配色を比べることもできます。
以下の動画でステップを確認してください。
In addition to comparing in layers, you can also compare side-by-side on one screen by displaying new windows.
Steps are described below the video.
レイヤーで比べる以外に、新規ウィンドウを表示して、一つの画面に並べて比較することもできます。
動画の下にステップを記載します。
- Display the “Color 01” layer and select New Window from the Window menu to open another window.
- Drag a tab on the newly opened window to detach it from the first window.
- By displaying “Color 02” in the Layers panel on the separated window, you can compare “Color 01” and “Color 02” side by side on the screen.
- Similarly, if you open another new window, detach it, and display the “Color 03” layer, you can compare the three color schemes side by side on the screen.
- 「Color 01」レイヤーを表示し、ウィンドウメニューから新規ウィンドウを選択すると、もうひとつ別のウィンドウが開きます。
- 新しく開かれたウィンドウ上のタブをドラッグして、最初のウィンドウから切り離します。
- 切り離したウィンドウに対して、レイヤーパネルで「Color 02」を表示させると、「Color 01」と「Color 02」を画面に並べて比較することができます。
- 同様に、新規ウィンドウをもうひとつ開いて切り離し、「Color 03」を表示させると、三つの配色のレイヤーを画面に並べ、比較することができます。
This time, I have described some useful functions and methods that can be used to come up with color schemes.
Using the above methods, you can easily create and compare various color scheme ideas.
Remember to save the file you have worked on so far at the end.
In the next article, I will explain the steps to add one last touch to the grid design for easy reference when weaving.
Thank you for reading to the end!
今回は、配色を考えるときに使える便利な機能と使い方を説明しました。
上記の方法を使うと、いろいろな配色のアイデアを簡単に作成して比較することができます。
ここまで作業したファイルを最後に保存することを忘れないでください。
次の記事では、最後の作業として、織るときに参照しやすいように、グリッドデザインにもうひと手間を加える手順を説明したいと思います。
最後まで読んでいただき、ありがとうございます。