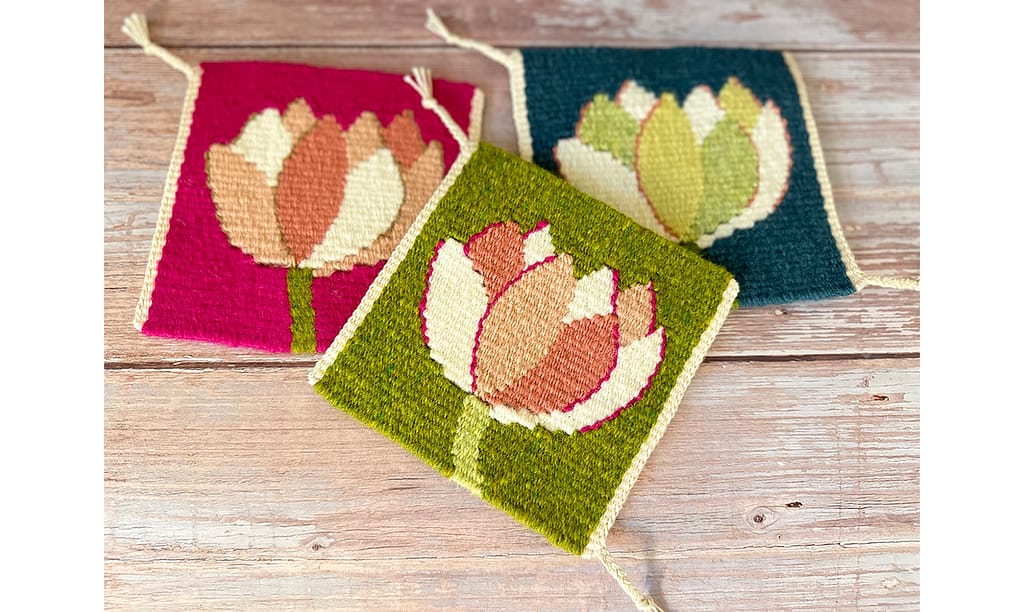
In a previous article “Weft Measurement Techniques for Efficient Weaving“, I introduced a method for preparing the required weft length in advance before weaving.
I explained that the method is effective when a grid design is being created in advance.
Once the number of rectangles that make up the grid is known, the length of weft needed can be determined.
In this article, I will explain how to count the number of rectangles that make up a grid using a grid design file created in Adobe Illustrator.
I have explained how to create a grid design using Illustrator in eight separate articles. Each of these articles can be found at the following links:
- [1] For basic information and basic operations of Illustrator, Adobe Illustrator for Weaving Grid Design
- [2] For information on how to create a grid template, Creating a Grid Template in Adobe Illustrator
- [3] For information on how to import a rough sketch, Placing a Rough Sketch in Adobe Illustrator
- [4] For information on how to create a rough grid design, Coloring on the Grid in Adobe Illustrator
- [5] For information on how to adjust the grid design, Adjust Grid Design for Easy Weaving (Work in Adobe Illustrator)
- [6] For information on how to register colors close to the weft, Matching Weft Colors for Grid Design in Adobe Illustrator
- [7] For information on useful features for making color schemes of grid designs, Considering Color Schemes in Grid Design Using Layers
- [8] For information on how to turn a grid design into a versatile PDF, Grid Design to PDF Files for Various Devices with a Twist
What will be explained in this article is how to count how many rectangles make up the grid design by color, and how to know in advance the length of weft needed.
The following items are explained in turn:
以前の記事「ヨコ糸の長さを決めて効率的に織る」で、織る前に予め必要なヨコ糸の長さを準備しておく方法について紹介しました。
その方法は、事前にグリッドのデザインを作っている場合に有効であると説明しました。
グリッドを構成する長方形の個数がわかれば、必要なヨコ糸の長さがわかります。
今回の記事では、Adobe Illustrator で作ったグリッドデザインファイルを使って、グリッドを構成する長方形の数をどうやって数えるか、について解説します。
Illustrator を使ったグリッドデザインの作り方については、8回に分けて説明してきました。それぞれの記事は、以下のリンクから参照してください。
- [1] Illustrator の基本情報・基本操作については、手織りグリッドデザインのためのアドビ イラストレーター
- [2] グリッドテンプレートの作り方については、アドビ イラストレーターで作るグリッドテンプレート
- [3] 下絵を取り込む方法については、アドビ イラストレーターに下絵を取り込む
- [4] ラフなグリッドデザインを作る方法については、アドビ イラストレーターでグリッドに色を塗る
- [5] グリッドデザインの調整方法については、織りやすいようにグリッドデザインを調整(アドビ イラストレーターでの作業)
- [6] ヨコ糸に近い色を登録する方法については、アドビ イラストレーターでグリッドデザインのためのヨコ糸色合わせ
- [7] グリッドデザインの配色時に使える便利な機能については、レイヤーを利用してグリッドデザインの配色を考える
- [8] グリッドデザインを汎用性のある PDF にする方法については、グリッドデザインにひと工夫いれて様々なデバイス用に PDF ファイルにする
今回の記事で説明する内容は、グリッドデザインを構成する長方形が色別に何個あるか数え、必要なヨコ糸の長さを事前に知る方法となります。
以下の項目を順番に説明していきます。
1. Select only rectangles of the same color | 同じ色の長方形だけ選択
Follow the steps below to select only the rectangles of the same color among the rectangles that make up the grid design.
- Open the grid design file in Illustrator. Select Open from the File menu to open the file.
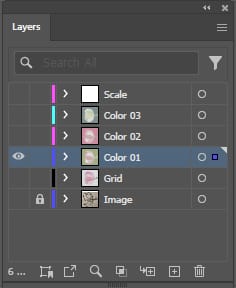
- If you have created several separate color scheme patterns in the Layers panel, display only one color scheme layer.
In the sample screenshot, only “Color 01” layer is visible.
以下の手順で、グリッドデザインを構成する長方形のうち、同じ色の長方形だけを選択します。
- グリッドデザインファイルを Illustrator で開きます。ファイルメニューから開くを選択し、ファイルを開いてください。
- レイヤーパネルで、いくつかの配色パターンを分けて作っている場合には、一つの配色のレイヤーのみ表示させてください。
サンプルのスクリーンショットでは、「Color 01」だけが表示されています。
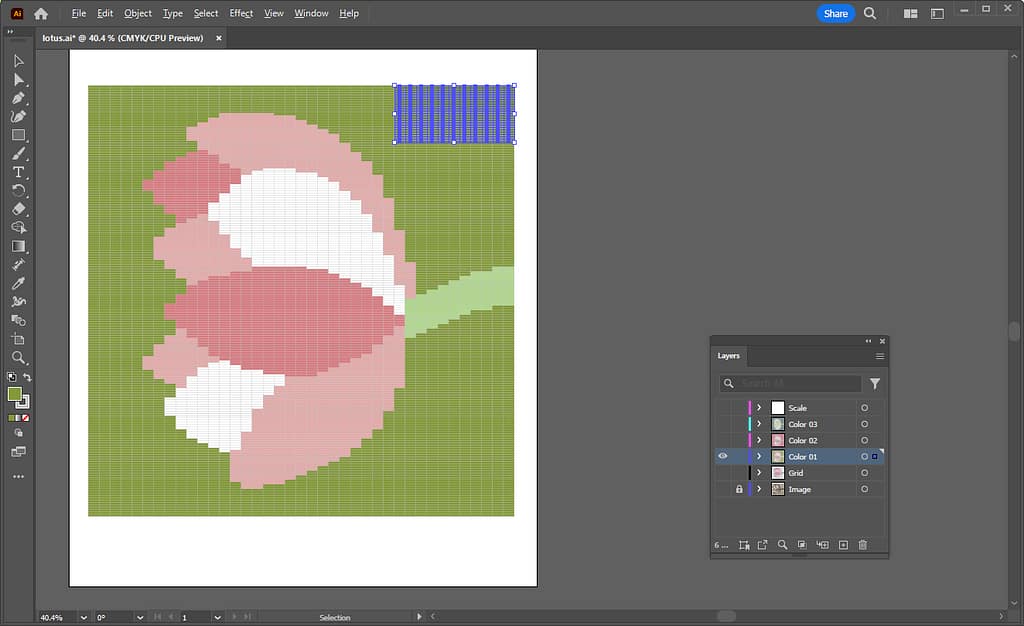
- Select one or more background rectangles.
In the sample screenshot, I selected multiple yellow-green rectangles.
- バックグラウンドの長方形を一つまたは複数選択します。
サンプルのスクリーンショットでは、黄緑の長方形を複数選択しました。
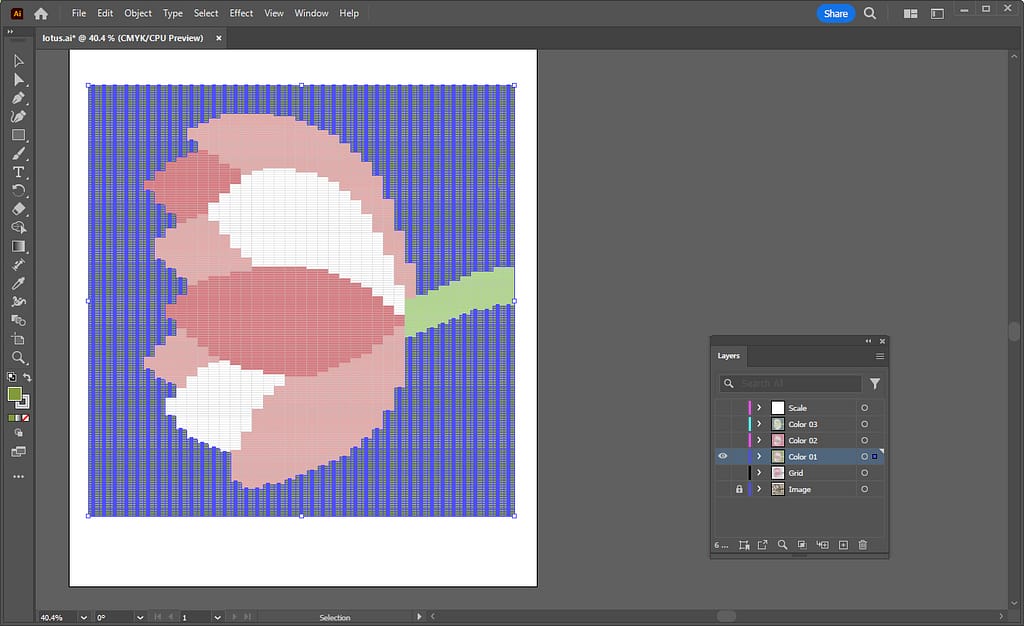
- Go to the Select menu – Same – Fill Color.
- Only the background rectangles are selected.
- 選択メニューの共通を選択し、カラー(塗り)を選択します。
- 背景の長方形のみ選択されました。
2. Check the number of rectangles selected | 選択した長方形の個数を確認
Next, check how many rectangles are selected. The procedure is as follows:
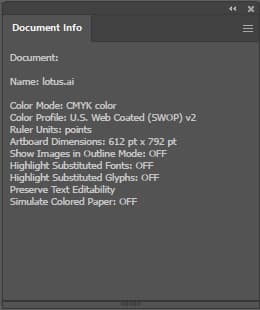
- Select Document Info from the Window menu to display the Document Info panel.
次に、選択されている長方形が何個あるか確認します。手順は以下です。
- ウィンドウメニューからドキュメント情報を選択し、ドキュメント情報パネルを表示します。
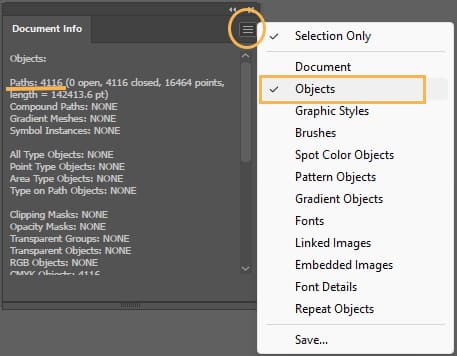
- Open the menu in the upper right corner of the Document Info panel and select Objects.
- ドキュメント情報パネルの右上のメニューを開き、オブジェクトを選択します。
- A number appears next to “Paths.” This number is the number of rectangles.
In the sample, there are “4116” yellow-green rectangles.
- 「パス」の横に数字が表示されています。この数が長方形の数となります。
サンプルでは、黄緑の長方形は、「4116」個あることが確認できました。
3. Calculate the length of the weft you need | 必要なヨコ糸の長さを計算
Let’s calculate the length of the weft you need using the number confirmed in the procedure 2 above. The calculation formula is as follows:
上記の手順2で確認できた数字を使って、必要なヨコ糸の長さを計算してみましょう。計算式は、以下になります。
Formula | 計算式:
| The number of cells (rectangles) ÷ the number of warp threads セル(長方形)の数 ÷ ワープの本数 |
The sample is designed with 39 warp threads, so dividing “4116” by “39” to calculate the number “105.5”.
In the sample, I would like to take a little extra for a couple of picks, taking into account that the tailings will be done several times, so I would decide the yellow-green weft for the background will be “110” picks.
When actually weaving the background, several parts are woven at the same time. It would be easier to weave if the weft is divided and wound on several bobbins such as for 35 picks + 35 picks + 40 picks.
Similarly, for the other colors, you can check the number of rectangles in the grid in the same steps, do the calculation, and take a little extra for tailings to get the length of the weft you need.
As explained above, the software is very convenient because it makes it easy to check the numbers.
Also, if you know the amount of weft you need in advance, you will not wind too much or too little weft onto the bobbin, and you will be able to weave without waste.
サンプルは、39本のワープでデザインされているので、「4116」を「39」で割ると、「105.5」という数字が計算されます。
サンプルでは、テール処理を何度か行うことを考慮し、2~3段分少し余分に取り、背景の黄緑色のヨコ糸は、「110」段分としたいと思います。
実際に背景を織る際には、いくつかのパートを同時進行して織ります。ボビンに巻く際には、35段分+35段分+40段分というように、いくつかに分けると、織る作業がスムーズになると思います。
同様に、他の色も同じステップでグリッド内の長方形の数を確認し、計算をして、テール処理分を少し多めに取っていくと、必要なヨコ糸の長さを知ることができます。
以上のように、ソフトウェアを使うと、簡単に数を確認できるので、たいへん便利です。
また、予め必要なヨコ糸の分量がわかっていると、ヨコ糸をボビンに巻きすぎたり、少なすぎたりすることがなく、無駄のない作業ができると思います。
Then, enjoy weaving! | あとは、織ることを楽しんでください!

Now that the grid design is complete, we have identified the length of each weft needed.
Once each weft is wound onto a bobbin and ready to go, all that remains is to enjoy weaving!
I hope the above information is helpful.
Thank you for reading to the end!
これで、グリッドデザインが完成し、必要なヨコ糸の長さも確認できました。
ヨコ糸をボビンに巻いて、準備をしたら、あとは、織ることを楽しむだけです!
以上の情報が参考になれば幸いです。
最後まで読んでいただき、ありがとうございます。